Showing posts with label frugal food. Show all posts

Thursday, 1 November 2012

Spicy green tomato and apple jam

A couple of weeks ago, Mr P and I stumbled across a rather wonderful community market garden, literally just around the corner from our flat. Quite an unexpected find, since this little oasis of freshly grown veg is situated in a plot of formerly derelict land directly behind the local co-op.
 
This presents a marvellous opportunity for us, since, despite having a fair-sized garden plot of our own, neither of us is known for our green-fingered prowess. More specifically, we're widely known as "the cactus people", because although we love plants, the only ones we've been able to successfully keep alive for any length of time are our growing family of cacti and succulents, lovingly named Cacky, Steve, Eccy Thump, Ecklefecken, Teddy, Spike, and Pineapple. Now, I realise I'm at risk of sounding unhinged and rambly. So let's get back to the point. The point is, our first trip to the community garden saw us come away with a veritable feast of scrumptious goodies to try, and this included a sad little bunch of green tomatoes that nobody seemed sure what to do with, but which resulted in a cry of "Green Tomato Chutney!" from yours truly.


In fact, after a flick through Mel's new book, "The Australian Women's Weekly Pickles and Chutneys", I decided to branch out a little and try out their green tomato and apple jam. Having had a sneaky test already (of course) I can advise it is entirely delicious in every way and would highly recommend that you give it a go.
 
This will make delightful stocking fillers this Christmas... if it lasts that long!
 
Spicy Green Tomato and Apple Jam, makes about 750ml
I've reproduced the ingredients from The Australian Women's Weekly Pickles and Chutneys below, with my adaptations in brackets, and my own instructions.
 
Ingredients:
3 large apples (600g), peeled
5 medium green tomatoes (500g), peeled, chopped (my tomatoes were of varying sizes, some to small to effectively peel, so I left the skins on and the jam didn't seem any the worse for it. I also had to add in a couple of red tomatoes to make up the weight)
250ml water
1/2 tsp ground ginger
1/2 tsp ground nutmeg
1 cinnamon stick
550g sugar, approximately
 
Method:
 
1. Chop the apples and combine in a saucepan with the tomatoes, water, ginger, nutmeg and cinnamon. Bring to the boil, then simmer, covered, for about 30 minuted until fruits are soft. Discard the cinnamon stick.
 
2. Tip the fruit mixture into a measuring jug and make a note of the amount. Then return the fruit mixture to the pan and measure out the same amound of sugar in the jug. Add this to the fruit mixture in the pan and then stir over a gently heat, without boiling, until the sugar is dissolved.
 
3. Bring the mixture to the boil, and boil it, uncovered for about 15 minutes without stirring, until the jam sets when tested. See this post for how to test for setting point.
 
4. Pour the hot jam directly into hot, sterilised jars and seal them whilst hot.
 
5. Decorate with festive ribbon, and Bob's your uncle!


Friday, 27 July 2012

Viennese Whirls

When I was a wee nipper, ours was never a particularly confectionary-heavy household. To this day, my Mum proudly tells stories of how I used to nibble at carrot sticks when the other kids were having sweets, and how, on warm days, I used to sit in a cardboard box in the garden, munching away on a bag of frozen peas. I'm pretty sure that this would be widely tutted at in today's society (by parties other than the vegetable-eating youngster, I mean), but that's not really the point...  

The point is, the first time I was introduced to some of the more spectacular-looking boxed confections, it made a pretty big impact. French Fancies seemed like cartoon goodies - out of this world - and Mr Kipling's Viennese Whirls were just about the ultimate in decadent chic.

So when I saw Mary-Anne on the Great British Bake off make her version of Viennese Whirls, 'Melting Moments', I knew I had to give them a try, and I've just been waiting for the opportunity to get around to actually doing it. I know that the buttercream she uses in the recipe is excellent, as I have used it in several recipes before, so I started out with very high hopes for re-living the sugar rush experiences of my youth.

Mary-Anne's original recipe can be found here, and is definitely worth a look, as is the rest ofher excellent blog. You will see by comparing her pictures to mine, that she's also a darn site better at piping than me. Hey ho, I'll live to pipe another day! For ease of reference, I've reproduced the recipe below, with instructions for making only a half quantity of the buttercream filling from the original recipe (which was ample for this amount of biscuits).


Viennese Whirls/Melting Moments


Ingredients

250g plain flour
58g cornflour
58g icing sugar
250g unsalted butter, room temperature
1 teaspoon pure vanilla extract
a little food dye (optional)


Method

1. Cream together the butter and icing sugar until very pale and fluffy. You will need to pipe it later, so take the hit now and do it properly, or your crampy fingers will never forgive you (I speak from experience here!)

2. Add in the vanilla extract and sift in the flour and cornflour. Beat together until the mixture is nice and smooth.

3. Spoon into a piping bag fitted with a star-shaped nozzle, and pipe out in circles on a lined baking tray. If you are conscientious, you may want to draw out the circles so that you get a good shape. If you want the distinctive coloured stripe on your biscuits, then paint a line of food dye down the inside of your piping bag before you fill it. Mary-Anne suggests matching the colour to the flavour of jam that you use in sandwiching them together. I've made them twice, once with strawberry jam, and once with a strawberry and blackberry jam that my Mum made - hence the batch of double-coloured biscuits.

4. Pop the biscuits in the freezer for 15 minutes to help them retain their piped appearance when you bake them. I only have a teeny overcrowded freezer box, so I tried putting them in the fridge for half an hour instead. It really didn't work as well, so bear that in mind if you do have the freezer option available to you.


5. Bake at 180°C  for 12 minutes, until the biscuits are slightly golden in colour.

6. Put the tray on a wire rack for a few minutes, and when the biscuits have cooled for a few minutes, remove from the tray and allow to cool completely on the rack.

7. Sandwich together with jam of your choice, and Mary-Anne's delicious 'depression era buttercream'. If you prefer the biscuits simple, leave them unsandwiched, and they will keep for about 4 days in an airtight container with no bother. Once they are sandwiched, though, they'll go soggy fairly quicky, so put them together when serving if possible.


Depression-Era Buttercream

(due to the cooling time needed, it may make sense to start this before you start the biscuits, just sayin').

Ingredients

125ml milk
2tbs plain flour
110g unsalted butter
110g caster sugar
1 tsp pure vanilla extract

Method

1. Gently heat the milk and flour, together on the hob, stirring continually with a whisk until the mixture thickens.

2. Continue cooking and stirring for another minute to get rid of the floury taste.

3. Pour the mixture onto a plate, cover closely with cling film, and allow to cool. The cling film will stop a skin forming. The mixture musst be totally cool before proceeding to the next stage, or your buttercream will end up as a melty, curdly mess.  

4. Beat together the sugar and butter until fluffy and pale in colour. 

5. Add the thickened milk mixture and continue mixing together until fully incorporated, pale and thick. Mary-Anne estimates that this will take another 10 minutes.

Monday, 30 January 2012

Squash and Butterbean Arancini

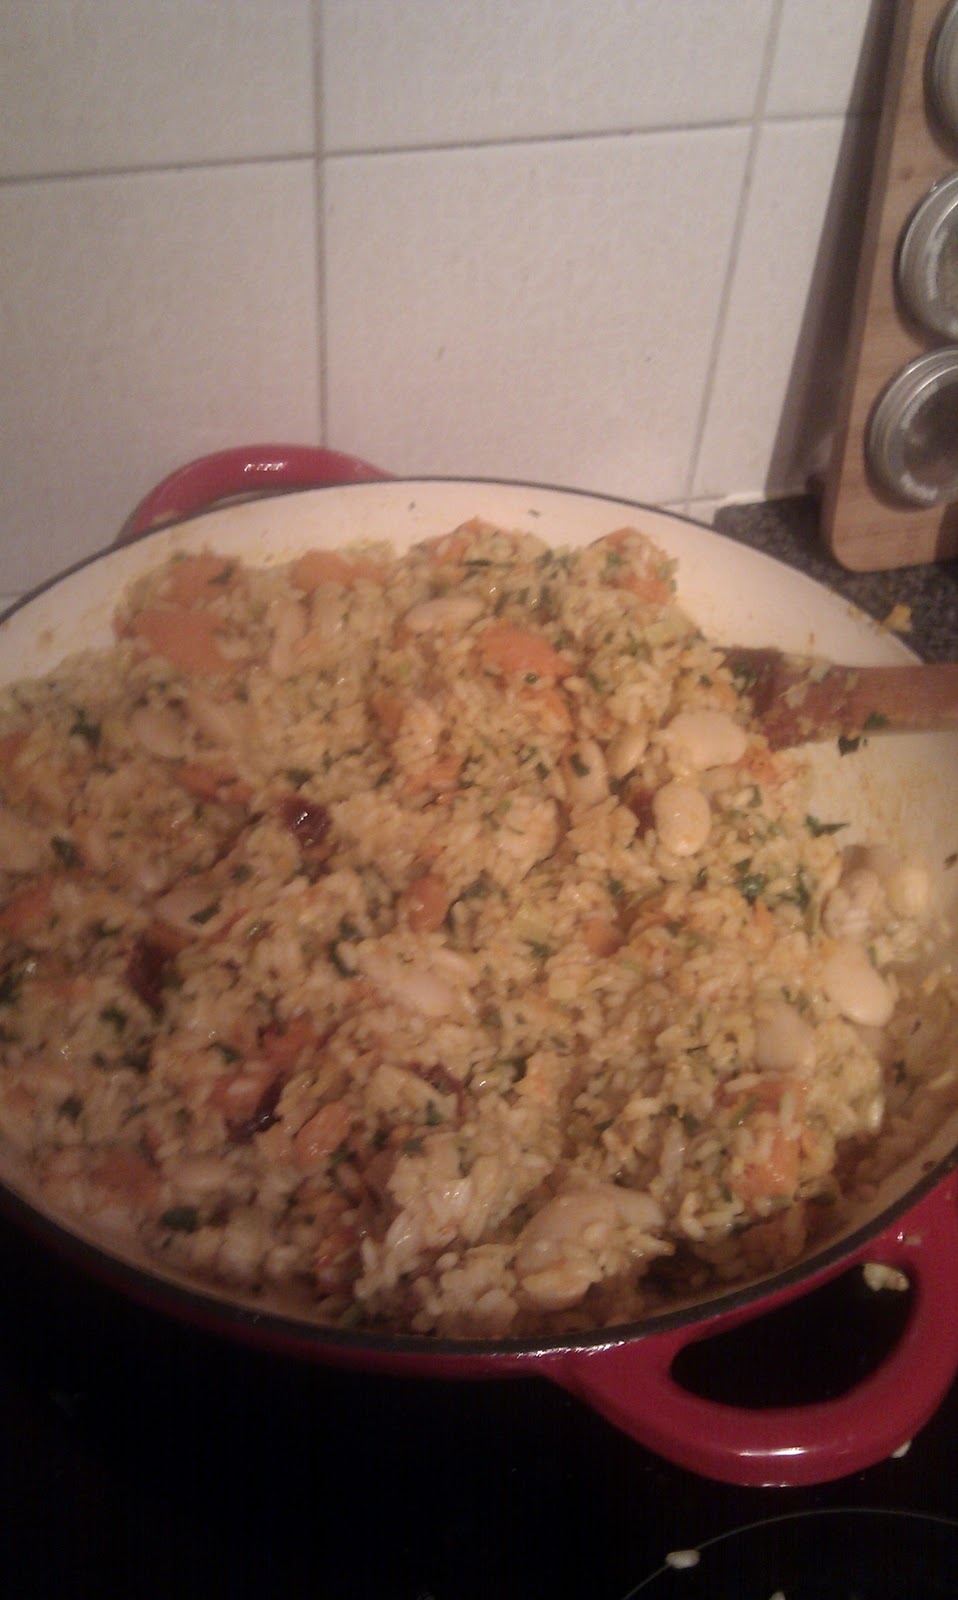
Recently I had my Dad come to stay, and as he's not as committed to getting his five-a-day as I might have hoped ("I eat vegetables a couple of times a week, I don't know what all the fuss is about!") I had to think of a way to fool him into eating them. He really loves butterbeans, so I thought a butterbean-based risotto might just do the trick.

Now because risotto takes so much time and attention, I never make it in anything less than a mammoth batch, freezing any excess for future dinners. And this means that I often have the raw materials in for the naughty delight of arancini... little fried rice balls with a gooey cheesy centre.


The risotto itself is a pretty good value meal, but since the arancini are made up from its leftovers, they're basically free food. I've submitted both to the Frugal Food Friday blogroll, hosted by Fuss Free Flavours.


Squash and Butterbean risotto
serves 4-6

Ingredients:

1 medium-sized squash (butternut, acorn or any small-ish squash work well)
1 tin butterbeans, drained
1 large onion, chopped
1 leek, chopped into rings
3 cloves garlic, crushed
knob butter
4-5tblsp olive oil
5-6 sundried tomatoes, chopped into sixths
2 cups risotto rice
1 litre good vegetable stock
small handful chopped fresh sage (or 1tsp dried)
tablespoon fresh rosemary (or 1/2 tsp dried)
tablespoon cider vinegar (optional)
salt and black pepper


Method:
1. Chop your squash in half, remove the seeds and scatter them across a small baking tray, and sprinkle with salt and pepper. Place your squash, cut-side down, on another baking tray. Add about 1cm depth of boiling water to the tray with the squash on and pop both trays in the oven at 200 degrees celcius. The squash will take about 20minutes to become tender, but you should check the seeds after ten minutes and give them a good shake about. The seeds will be done when they are no longer moist, but crisp and golden on the outside. When the seeds are done, set them to one side to cool. Meanwhile, prepare the rest of the ingredients.

2. Melt the butter in a large pan with a tablespoon of the oil, then gently fry off the onion for a couple of minutes before adding the leek and garlic and frying for another minute or so.

3. Add the sage, rosemary, tomatoes and rice, and keep stirring for a couple of minutes until the grains and coated in the buttery oil, and all the ingredients are evenly mixed together

4. Next, start adding the stock, a little at a time, and stirring continuously until it is completely absorbed. When you have added half to three quarters of the stock, it's probably time to retrieve the squash from the oven. Let it cool until you can safely handle it, and while you are waiting, add the butterbeans to the risotto with some more stock, stirring continuously. 

5. Using a dessertspoon, scoop out the tender flesh of the squash. It should be pretty much cooked. I like to keep it in fairly large chunks for texture. You can add it straight to the risotto with any remaining stock and the cider vinegar, if using. Stir until all liquid is dissolves, season with salt and pepper, and serve immediately. Alternatively, you can allow this to cool and freeze it to eat later.

Squash and Butterbean Arancini
Makes 15-20

This recipe works with any leftover rice or risotto dish. However, it tastes particularly good with this risotto due to the sweetness of the squash, and the slight bite of the cider vinegar. These arancini do end up a little larger than usual though, as they have to accomodate whole butterbeans.


Ingredients:
2 cups leftover squash and butterbean risotto
15-20 1cm cubes of cheddar cheese
handful grated cheddar cheese
6-8 slices bread, as breadcrumbs
4tblsp vegetable oil

Method:
1. Mix about a third of the breadcrumbs into the risotto, together with the grated cheese, and mould this into balls about 2-3cm across.

2. Insert a cube of cheese into the centre of each ball, and roll the balls in the breadcrumbs.

3. Heat the vegetable oil in a frying pan, and shallow fry the balls for about 5mins, until golden brown all over. When done, sit on a piece of kitchen towel to absorb any excess oil.

4. Serve immediately. These are delicious served as a main meal in a tomato sauce, or accompanied by a peppery rocket salad and tomato pasta salad.


Inspired? Check out some more frugal recipes...


Sunday, 29 January 2012

Hasselback potatoes

How's that for an incentive?
This week, I have mostly been working from home - wading through a giant stack of undergraduate exam papers. I feel that this kind of task is best met not in an office full of people, but in velour joggers* on a large sofa, with tea on tap and access to periodic 'incentives' (such as this morning's elevenses - a slice of my yummy Christmas cake).


Anyhoo, earlier this week as a little reward for getting through the first batch, I decided to act on a colleague's tip about Booth's supermarket. I'd never heard of it before, but when she painted it as a paradise of obscure and wonderful culinary delights, I knew I'd have to take the trip out there. It would have been nice to get out of the house anyway, but the whole trip took on the air of pilgrimage when I made what I consider to be one of my most significant foodie discoveries ever... Vegetarian Parmesan, by Bookhams. It comes in a lovely big hard wedge, unlike the 'free from' powdered version. They can't actually call it Parmesan due to European rules, so it's called Vegetarian Pasta Cheese instead - made with vegetarian rennet.

Now of course this discovery deserves a fancy-schmancy application, probably courtesy of Hugh F-W's River Cottage Veg cookbook. And that will come in a few days.

But in the meantime, let's go back to basics with a Mary Berry recipe that basically cooks itself, leaving you free to sit trundling though stacks of essays to your heart's content. This comes from Mary Berry's Complete Cookbook. I was introduced to the 2003 edition by my old friend the jazz trumpeter and have never looked back. It's a brilliant reference work of pretty much every well-known recipe you could want to make, from Cinnamon buns to Teriyaki and Nasi Goreng to Vegetable terrine. The new edition is currently available for pre-order on Amazon, so if you don't yet own a copy - go out and buy it at once!

*Yes, velour. I simply couldn't part with them after the ill-advised velour tracksuit phase of about ten years ago, so now they come out as a guilty pleasure at marking time. Judge if you want.

Hasselback potatoes
Allow one large potato per person as a side dish, or two as a main meal with a side salad.

Ingredients:
large potatoes (as many as necessary)
one knob of butter, melted per each two potatoes
salt and pepper
Parmesan cheese, grated - enough to sprinkle over each potato

Method:
1. Cut a thin slice of the bottom of each potato so that it will sit flat on a baking tray. Push a skewer through the potato length-wise, a quarter of the way up the potato.

2. Make vertical cuts, three-quarters of the way through the potato, at roughly 5mm intervals. You can just cut all the way down to the skewer without worrying about not accidentally chopping all the way through. Remove the skewer and prepare the rest of the potatoes in a similar way.

3. Put the potatoes on a baking sheet, and brush with the melted butter, making sure that it goes down all the cracks. Season with salt and pepper.

4. Bake in a preheated oven at 220 degrees celcius for about 40 minutes, then sprinkle the parmesan on top and bake for another 10 minutes.

5. Serve at once!