Showing posts with label cupcake. Show all posts

Friday, 20 September 2013

Simplicity defined - customisable cupcakes

I love a good cupcake. It's amazing when you have a tiny package of sugary perfection with unexpected treats hidden inside and lashings of frosting on the outside. It puts me in mind of a sucrose-loaded wonderland where all your diabetic dreams can come true.
 
But I also love an easy ride, and sometimes there's just not time to faff around with complicated recipes. At these times, I return to a trusted favourite - standard cupcakes 'like Granny used to make'. This was back in the days of pounds and ounces, which makes the recipe super easy to remember. In ounces, it's
 
The same of everything, and half as many eggs.
 
This simple mantra is a revelatory truth in the kitchen.
 
e.g. 2oz each of Sugar, butter and self raising flour, plus one egg.
 
It's easy to multiply up, and it's also very easy to customise. So here are some ideas and examples...


Classic cupcakes
 
Ingredients:
 
2oz (55g) unsalted butter
2oz (55g) sugar
2oz (55g) self raising flour
1 free range egg, beaten
 
 
Method:
 
1. Cream together butter and sugar.
 
2. Stir in the egg.
 
3. Fold in the flour.
 
4. Divide the mixture between 9 cupcake cases and bake for 20 minutes at 180 degrees Celsius/gas mark 4.
 
 
Customise those bad boys!
 
You want a classic chocolate cupcake? Remove a dessert spoon of the flour, and replace with two dessert spoons of cocoa powder.
 
You prefer a bit of chocolate fudge? Replace the caster sugar with muscovado sugar. And while you're at it, why not cut up some small chocolates, and plonk a lump of each into the centre of each cake!
 
Vanilla's more up your street? Well, be my guest and add a teaspoon of vanilla extract to your batter! Hell, if you're fancy, you can even scrape the seeds our of a vanilla pod instead and add those.
 
Want something delicate and fluffy - go for golden caster sugar instead of the standard stuff!
 
Fancy a bit of fruit? Stir a spoonful of berries or jam through your batter before spooning it into the cupcake cases! Or stir in half the juice and the grated zest of an orange, lemon or lime (save the rest of the juice to make up a simple icing with icing sugar).
 
 
Get decorating
 
Batman cupcakes
Go for a simple icing of icing sugar and water, or icing sugar with fruit juice (and colouring for a bit of a change). Whilst it's wet, you can add whatever jellies or sprinkles you fancy.
 
Add a thin layer of melted chocolate - super simple! And why not chuck on some mini eggs for giggles?! Another variant of this is to melt Mars bars in a bain-marie, and spread the resulting fudgey gloop over the top of your cupcakes. Yum.
 
Load it up with a fancy ganache or a simple buttercream (see here) or if you're feeling lazy, you could always try a shop-bought frosting - though I have to admit when I tried Betty Crocker's chocolate fudge, I was pretty darn disappointed. You can use custom-made (non-edible) decorations for super-speedy decorating.
 
Get creative with sugarpaste - the key to effective sugarpaste tops is to simplify ideas to their component parts and that way you'll have really eye-catching designs. I made some chocolate fudge cupcakes for a friend's recent Batman-themed birthday party, and based the tops on the motifs and costumes of some of the characters from the comics.
 

Batman cupcake
Robin cupcake
Joker cupcake


Harvey Dent/Twoface cupcake


Poison Ivy cupcake
Harley Quinn cupcake


Monday, 5 November 2012

P...p...p...pick up a penguin!

One of the great things about being known as a fan of baking and cake decorating, is that I fairly often get asked by friends to make cakes for special occasions in their families. I always love it when this happens - there's only so much sugarpaste Mr P and I can eat, so having a good excuse for an artistic project for somebody else is always welcome.
 
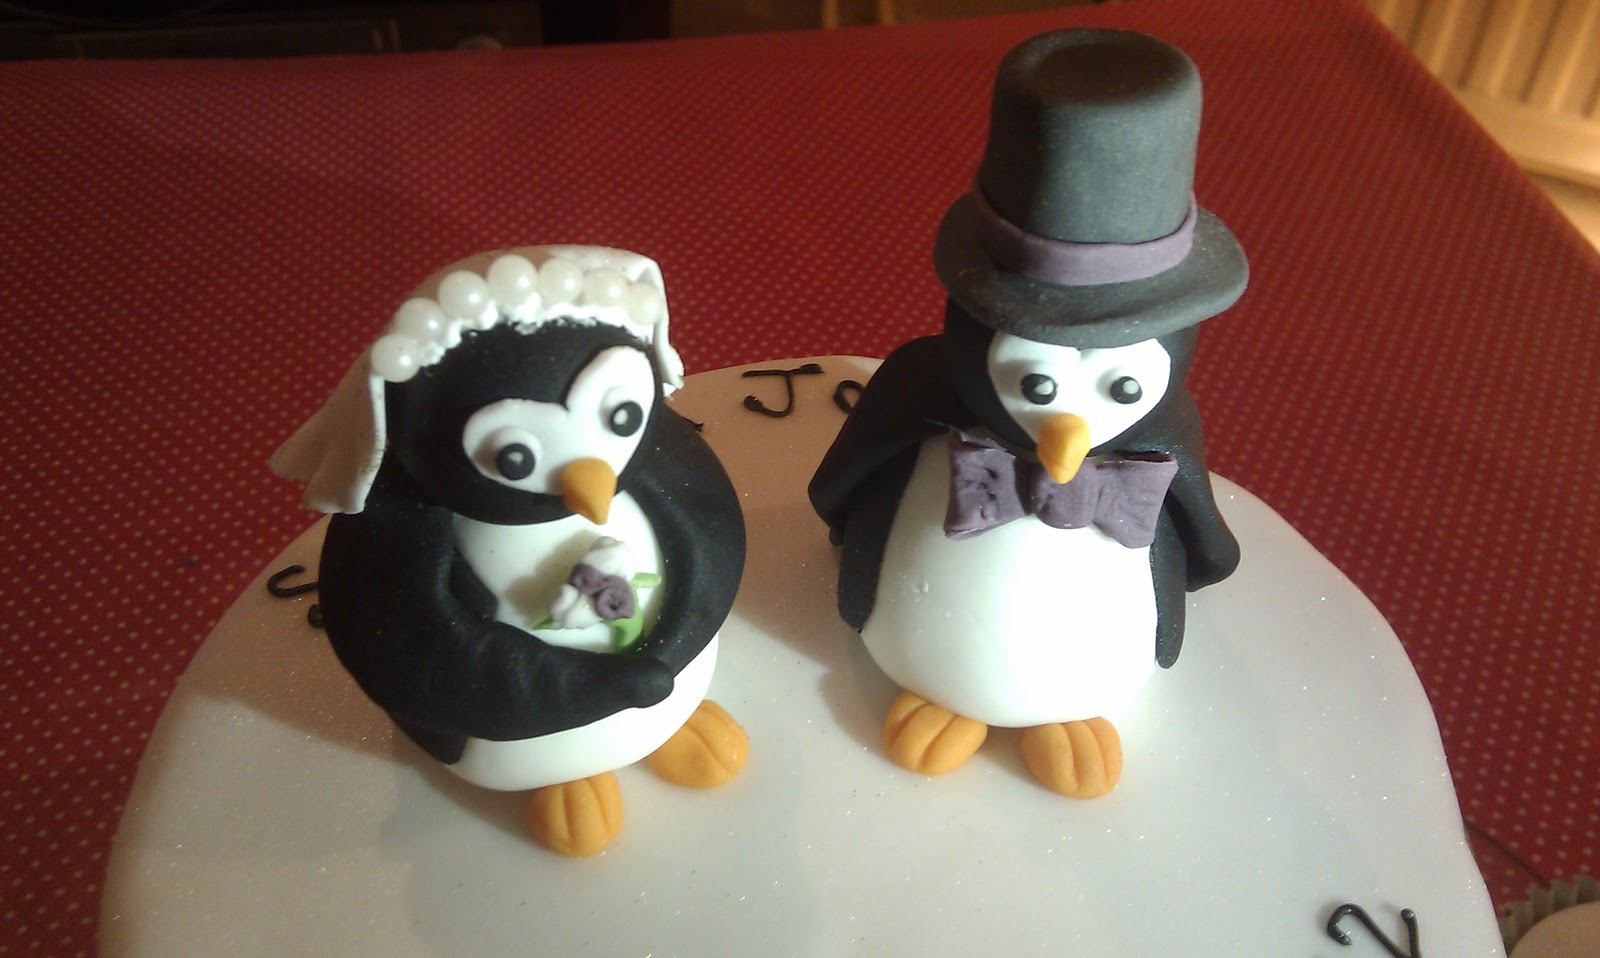
Most recently, I was asked to create a small wedding cake as a surpise for a friend's sister- and brother-in law. I was told that the bride and groom were both big fans of cocktails, and that the wedding invitations had been sent out on reproductions of the title pages of Penguin romantic classics. What a great brief, eh?
 
Penguin cake topper
 
So the final product was a strawberry daiquiri-flavoured cake (lime and rum sponge sandwiched with home-made strawberry jam and strawberry and rum buttercream). With the help of my trusty pal Mel (who is experienced in the subject of sugarpaste penguins!) it was decorated with detailing from one of the book covers, and a penguin bride and groom cake topper.


Penguin wedding cake


The summer saw a couple of other good projects to get my teeth into. Mr P's Nan celebrated her 80th birthday in August with a big family get-together, so we decided to make up a batch of cupcakes to keep all of the guests satisfied. As well as a traditional lemon flavoured batch, we came up with a very popular cupcake flavour - tea and biscuits! This was done by brewing a tea bag in a dah of warm milk, and adding the milk together with just a smidgin of cocoa powder to a fairly standard sponge mix. Simple and effective! This left us with plenty of energy to focus on decorating all of the cupcakes.


And finally, last but not least, a friend of mine recently wanted to surprise her Mum, 'Dove', with a celebration cake for her 60th birthday. As her mother had somehow managed to sleuth out each and every one of her other birthday surprises, I was especially happy to be involved in this. And happily, the first she knew of it was when the cake turned up in front of her at the end of the evening!


Friday, 18 May 2012

How does your garden grow?

Today is a day for feasting and celebration!

There are several reasons for this. Firstly, I am having the day off in anticipation of jetting off on my holidays this weekend, hurrah!

But mostly, a very lovely lady has a birthday today. And as well as being the birthday girl, she has recently purchased her very first house. Since I'll be away for the housewarming, I thought the least I could do would be to make some kind of cosy-making contribution. And given that the garden's always the last thing on a long line of new home chores...


P's Praline Plant Pots
Dairy-free
100% edible
Makes 6-8 'plant pot' cakes or 8-10 cupcakes


Ingredients:
For the cakes:
100g caster sugar
40g light muscovado sugar
150g dairy-free margarine (I used vegan Vitalite)
2 eggs, beaten
100g self raising flour
40g cocoa powder
10g ground almonds
splash of hazelnut milk (any non-dairy milk will work though)


For the edible 'soil':
15g plain flour
15g light muscovado sugar
dessert spoon cocoa powder
15g dairy-free margarine
(or if you're feeling lazy you could crush up some Bourbon biscuits instead)


For the frosting:
50g dairy-free margarine
15g cocoa powder
35g icing sugar
splash of hazelnut milk


Method:
1. If making the edible soil from scratch, prepare that first. Mix together the dry ingredients, then rub in the fat until you achieve a crumble consistency. Spread the mixture out on a baking tray covered in baking parchment. (For a dairy version of the recipe, you can substitute the dairy-free margarine for ordinary chilled butter, in cubes, throw everything into a food processor and pulse. However, if you try that with a margarine you will get a paste instead of a crumble texture, so you'll need to rub the fat in by hand).


2. For the cakes, mix together the sugars, then cream together with the margarine until fully mixed and light in colour.

3. Gradually add in a little of the beaten egg, stirring well. Continue until you have added half the egg, then add half the flour and stir in well. Gradually stir in the remainder of the egg, then add the rest of the flour, cocoa, and almonds and stir until completely mixed. Stir in a splash of the milk at the end to loosen the mixture slightly.

4. Spoon the mixture into cupcake cases or silicone plant pot moulds. Bake the cakes and the 'soil' at 180 degrees celcius. Ordinary cupcakes will take 10-15 minutes, but the deeper 'plant pots' will take around 25 minutes. The soil will be ready in 10-15 minutes.


5. Allow to cool thoroughly on a cooling rack. Meanwhile, prepare the frosting. Stir together all of the ingredients except the milk until they are roughly mixed. Then use an electric whisk and beat well for around 5 minutes until the mixture is light and fluffy. Add in a splash of milk and beat for another minute or two.


6. Finishing: If you  have used silicone plant pot moulds, you can serve in them. If you prefer, to make a fully edible plant pot, remove the cakes from their moulds when cool, level off the top and cover the outside in a thin layer of terracotta-coloured sugarpaste. Make the rim of the pot by adding a thin stip of sugarpaste at the top edge. Make sure that this is higher than the top edge of the cake. Cut a well in the centre of each cake, fill with buttercream, then replace the cut-away piece of cake in the centre. Spread a thin layer of buttercream over the top of the cake to enable the 'soil' to stay in place. Sprinkle with the edible soil, and finish with sugarpaste flowers of vegetables. I made my carrot leaves using sprigs of coriander.


So, Miss T... let me take this opportunity to wish you Very Many Happy Returns of the Day:

Happy Birthday!
Happy New Home!
Happy New Garden!

Sunday, 22 May 2011

Easter Treats - Creme Egg cakes and Mini Egg cakes

 
This recipe makes a total of around 12-16 cakes. They are incredibly rich, but look really impressive and make a wonderful treat for Easter.


Ingredients

Cake mixture
50g Stork
225g caster sugar
3 eggs
2tsp vanilla extract
210g self raising flour
2tsp cream of tartar
4 tblsp cocoa powder
100ml milk
pinch salt
1 bag mini eggs
3 or 4 bags mini creme eggs (about 15-20 eggs)

Frosting for creme egg cakes
120g icing sugar
25g unsalted butter
1 tsp vanilla extract
4 standard-sized creme eggs, halved and with the centres scooped out

Icing for mini egg cakes
30g icing sugar
1tsp vanilla extraact
enough water to make the icing mixture coat the back of a spoon
about 6 squares of milk chocolate, roughly chopped.


Method

1. Preheat oven to 180 degrees celsius.

2. Cream together the stork and caster sugar with the back of a wooden spoon.

3. Gradually add the eggs, stirring continuously.

4. Add the vanilla extract, salt, cream of tartar, half of the cocoa and half of the flour, and stir gently until thoroughly mixed.

5. Stir in the milk, and then the remaining flour and cocoa, until the mixture becomes thick and smooth.

6. Spoon into cupcake cases or a muffin tray. Insert one mini creme egg into each of the cakes that will become a 'creme egg cake', ensuring that the top is covered with cake mixture. Insert three mini eggs into each of the remaining cakes. These can be covered or uncovered as per your preference.

7. Bake for about 15 - 20 minutes until the cakes spring back up when pressed. Transfer to a wire rack to cool.

 
As the cakes are cooling, you can prepare the frosting....

1. Whisk half of the icing sugar, all of the butter and vanilla extract together for about 3-5 minutes until smooth.

2. Gradually add the rest of the icing sugar and the fondant from inside the creme eggs, continuing to whisk. You can add a tablespoon of milk at this point if necessary.

3. Use a piping bag to pipe the frosting onto the top of the creme egg cakes, top each one with half of a full-sized creme egg, and pipe a spot of frosting on top.

4. For the mini egg cakes, mix together the icing sugar, vanilla and water until the icing is thick enough to coat the back of a spoon.

5. Drizzle the icing in haphazard lines over the mini egg cakes, and whilst it is still wet, add the roughly chopped chocolate as decoration.

6. Enjoy! Preferably with a good cup of tea.