Showing posts with label wedding cake. Show all posts

Monday, 5 November 2012

P...p...p...pick up a penguin!

One of the great things about being known as a fan of baking and cake decorating, is that I fairly often get asked by friends to make cakes for special occasions in their families. I always love it when this happens - there's only so much sugarpaste Mr P and I can eat, so having a good excuse for an artistic project for somebody else is always welcome.
 
Most recently, I was asked to create a small wedding cake as a surpise for a friend's sister- and brother-in law. I was told that the bride and groom were both big fans of cocktails, and that the wedding invitations had been sent out on reproductions of the title pages of Penguin romantic classics. What a great brief, eh?
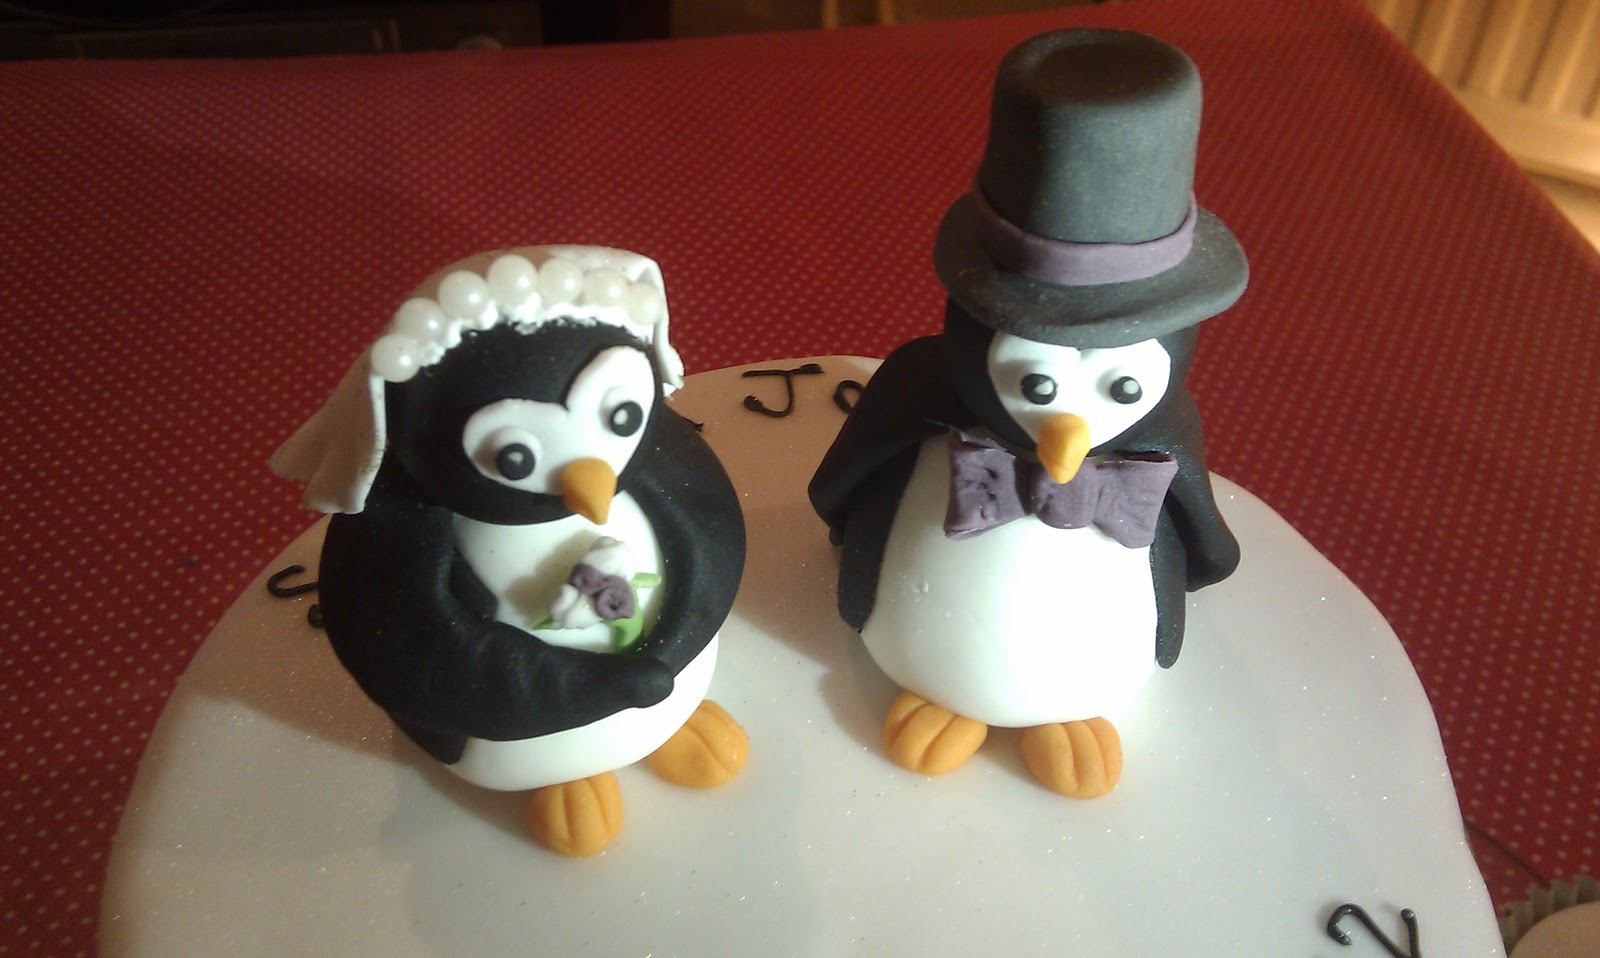
 
Penguin cake topper
 
So the final product was a strawberry daiquiri-flavoured cake (lime and rum sponge sandwiched with home-made strawberry jam and strawberry and rum buttercream). With the help of my trusty pal Mel (who is experienced in the subject of sugarpaste penguins!) it was decorated with detailing from one of the book covers, and a penguin bride and groom cake topper.


Penguin wedding cake


The summer saw a couple of other good projects to get my teeth into. Mr P's Nan celebrated her 80th birthday in August with a big family get-together, so we decided to make up a batch of cupcakes to keep all of the guests satisfied. As well as a traditional lemon flavoured batch, we came up with a very popular cupcake flavour - tea and biscuits! This was done by brewing a tea bag in a dah of warm milk, and adding the milk together with just a smidgin of cocoa powder to a fairly standard sponge mix. Simple and effective! This left us with plenty of energy to focus on decorating all of the cupcakes.


And finally, last but not least, a friend of mine recently wanted to surprise her Mum, 'Dove', with a celebration cake for her 60th birthday. As her mother had somehow managed to sleuth out each and every one of her other birthday surprises, I was especially happy to be involved in this. And happily, the first she knew of it was when the cake turned up in front of her at the end of the evening!


Thursday, 15 December 2011

Seasons Greetings! Rich fruit cake

Christmas is just around the corner, and if you've left it until to now to make your cake, you may well be starting to panic. Well, fear not. Whilst this fruit cake (like most) does taste richer and fuller over time, there's enough content in there that even if you only make it a couple of weeks in advance, it's still going to taste pretty delicious.

This recipe will make a generously sized Christmas cake (9" across, and 4" deep).

Ingredients:
260g currants
250g sultanas
250g raisins
200g glace cherries, rinsed and halved
185g dried apricots, roughly chopped
125g dried figs, roughly chopped
100g mixed peel
75g dried cranberries, rinsed
3 tblsp creme de cacao
2 tblsp brandy
300g plain flour
300g butter
300g dark muscovado sugar
5 eggs
1 tblsp treacle
1/2 tsp cinnamon
pinch ginger
3 or 4 cloves, ground
1/2 tsp nutmeg
60g almonds, roughly chopped
zest of 1 orange
zest of 1 lemon

Method:
1. Soak all of the fruit and peel in the alcohol for a minimum of 6 hours, and preferably overnight.

2. Double-line and double-grease a 9" round springform tin.

3. Beat together all of the other ingredients, add the fruit and any liquid and mix in.

4. Turn into the tin, level off the top and cover with baking paper.

5. Bake at 140 degrees celcius, for about 4 hours.

6. Once the cake is cooked, leave to cool in the tin. When cool, prick four or five times with a skewer and 'feed' with 2 tblsp brandy. Once this has soaked in, re-cover and keep in a cool, dry place. Feed the cake periodically, depending on how much time you have left (once every week-fortnight if you have a couple of months, or twice per week if you only have a couple of weeks).

To decorate:

You will need to start this at least 3-4 days before the cake is needed. Firstly, you need to secure your cake to an appropriate cake board, securing it with a good dollop of royal icing.

1. Roll out 500-550g of marzipan, on a surface lightly dusted with sieved icing sugar.

2. Add a dash of boiled water to a tblsp of apricot jam on a medium heat, until it starts to melt. Cover the cake in the melted jam, then use the rolling pin to lift the marzipan over the cake. Smooth down over the cake and trim to fit. Leave the cake for a couple of days so that the marzipan can dry out a little before icing.

3. Roll out 500-550g of ready-to-roll icing on a surface lightly dusted with icing sugar. Make sure you knead it for at least five mintues beforehand, until the texture becomes easily workable, like playdough. If you don't knead it enough, then the final result will crack.

4. Coat the marzipan in a little warm water, then use the rolling pin to lift the icing over the cake. Smooth down over the cake and trim to fit.

5. Pipe around the bottom of the cake with royal icing. Decorate with ready-made decorations, or make your own using more ready-to roll icing, securing with water or with royal icing for a stronger bond. Here are some of my creations:


You can really let your imagination do the talking with your decorations - hopefully some of these ideas will give you inspiration. These delicious cakes make wonderful Christmas gift - to present them, just sit each cake on a large piece of cellophane, gather the cellophane up at the top and secure with a festive ribbon. It will keep your cake covered and airtight until Christmas, and just visible enough to add to the festive vibe in the run up to the big day. I'm sure from these photos you can guess what my family and friends will be receiving as gifts this year.....


Thursday, 18 August 2011

The story of the wedding cake (day 3)

Hurrah! The exciting day of construction and decoration has arrived!

1. I inserted dowel rods into the bottom two tiers to support the tiers to be placed above them, so that the sponge would not have to take the weight.  


2. I then inserted a long dowel rod through the centre of the bottom tier, which would act as a central skewer, keeping all three tiers securely together...


... then lowered the middle tier onto the rod...


... and then added the top tier.


I offset the tiers slightly to the back of the cake, so that there would be slightly more openness to the front of the cake.

3. I then made the final touches to the finish of the icing, smoothng and polishing it well.


4. Finally, the most fun part: decoration! Red and gold are the traditional colour for Hindu ceremonies, so I started with a sheer red ribbon to the bottom of each of the tiers, as this was a good way to tidy the joins between tiers without using piped royal icing. I thought this would give the cake a more contemporary feel.

5. I then started to add the gold leaves and red roses, using an edible glue adhesive. Some of the larger, heavier roses were more difficult to attach in this way, so I used royal icing. This seems to give a more sturdy hold even than purpose-made edible glue.   


6. I made a small mound of roses and leaves on top of the top tier, and then a small bunch of roses on opposite sides of the bottom two tiers - nothing too symmetrical, as I preferred a more natural look.

Here is the finished item.


Tuesday, 16 August 2011

The story of the wedding cake (day 1)

First of all, huge apologies for leaving it so long between posts. I spent the first half of August doing  (and the second half of July preparing for) a trip to southern Belarus, volunteering with Chernobyl Children's Project (UK), and without any access to the internet (or non-radioactive ingredients, but that's beside the point). Some Belarus-insipred recipes will doubtless follow, but in the meantime the next few entries will surely make up for the recent lack of action on my part.


My first culinary project since returning has been the challenge of creating a three-tier maderia wedding cake to feed about 130 people, for my friend A's Hindu wedding ceremony. Welcome to the story of the wedding cake...

Day 1

1. The first step was to bake the top two tiers - 6" and 9" madeira cakes, made according to my 'perfect madeira cake' recipe. Luckily these just about managed to fit together on one shelf of my oven, leaving the top shelf free for a baking sheet to shield them, and the oven floor clear for a bowl of water to ensure that they would be super moist.


2. Whilst these were baking in the oven, I started making the icing roses to decorate the cake. Before leaving for Belarus, I had already mixed the perfect shade of deep red icing, using the red of the cake ribbon and the silk petals that the bride was using for table decorations as a colour reference.


I had initially thought about hand-making the roses from scratch, but soon realised that for the amount I would need, this would be an impossibly time-consuming task, so I invested in a silicone rose mould - worth every penny! Just squelch the icing into the mould, wiggle out, and you're done! Rubber gloves are highly recommended for this stage, since the gel food colouring is so potent that it can easily dye skin. Many thanks to M for her slave labour assisting with the roses!


3. As a side project, I started thinking about what I could do with the juice of the 10 lemons I'd zested for the wedding cake (but that's another story entirely).


4. Top two tiers successfully baked, and time to start on the almighly bottom tier, for which a whopping 15 eggs were needed. The lemon in the bottom picture gives and idea of the scale of the thing when it came out of the oven.


And with the newspaper removed, you can see just how much the cake rose above the line of the tin...


So - day one ends. All three tiers are baked and wrapped airtight. The majority of the roses are moulded, and I have cut some rose leaves out of ivory coloured icing, ready to paint gold tomorrow.


The kitchen is covered in the compnonent parts of a wedding cake, and the whole house smells like a confectionary shop. Sweet dreams!

Sunday, 12 June 2011

The perfect madeira cake!

I adapted this marvellousrecipe for an 8" round Madeira cake from lindyscakes.co.uk....


Ingredients:

12 oz Stork
12 oz golden caster sugar
12oz self raising flour
6 oz plain flour
6 large eggs
2 lemons - zest only
Method:

1. Line an 8 inch round springform tin with baking paper and cover the ourside of the tin with four of five layers of newspaper. This will stop the outsides of the cake from cooking too fast, and will help your cake to rise nice and even on top, instead of being domed.

2. Cream together the Stork and the sugar until nice and light and creamy.

3. Add in the beaten eggs, one at a time with just as much flour as you need to stop it curdling (as little as possible).

4. Mix in the flour and the lemon zest. Don't worry if the mixture is gloopier than you are used to - it's supposed to be quite thick and stodgy.

5. Transfer into your baking tin, but scoop the middle of the mixture completely out, so that the mixture is sitting in a doughnut shape in the tin.

6. Pop into a preheated oven at 160 degrees Celsius, with a baking tray on the shelf above to protect it from too much heat. Put a bowl of water on the floor of the over so that the cake comes out nice and moist. Bake for 1 1/4 to 1 1/2 hours.


To decorate:

Ingredients:

half a jar of strawberry jam
one batch of lemon buttercream icing (use about1/2 to 3/4 block of unsalted butter)
500g ready-to-roll icing
various food colourings and cake decorations, to your preference


Method:

1. When the cake has completely cooled, cut in half and spread about a third of the strawberry jam on the top of the bottom slice. This will be easier if you boil the jam first, then allow it to cool slightly.

2. Spread the buttercream icing on top of this and andwich the cake halves together.

3. Roll out the icing as per the packet instructions, into a ice big circle.

4. Cover the whole of the cake in a very thin layer of jam, for the icing to stick to. Then use a rolling pin to lift the icing over the cake. Starting from the middle of the top, press the icing down and secure to the sides.

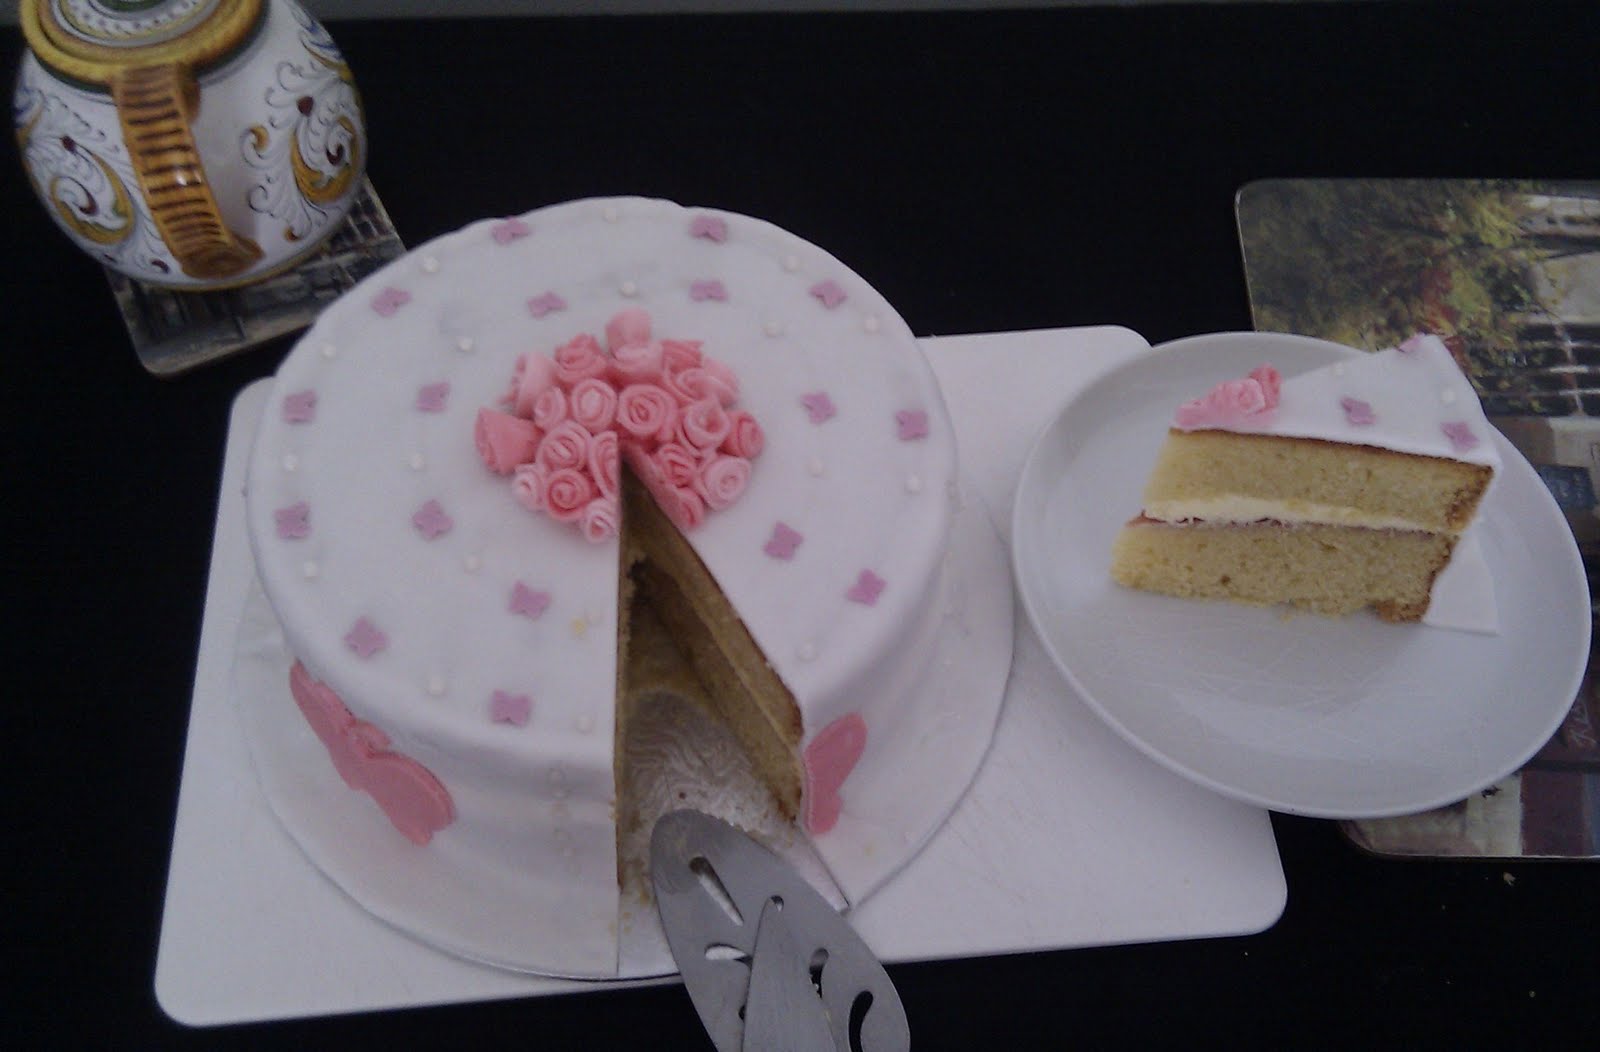
5. Decorate the cake as per your preference. I used pearl dragees, small sugar butterflies, and I also made butterflies and roses from icing dyed pink. The roses are pretty easy to make - cut a piece of icing about 1-2cm wide and 8-10cm long, and wind it into a rose shape, nipping the bottom together. You can stick this to the cake using water or edible glue.


Enjoy with a lovely pot of tea!