Monday 17 December 2012

German Christmas Biscuits (1)

Christmas comes but once a year, so you might as well make the festive season last!
 
For me, the most important part of the Christmas festivities is the feasting, and I love having the excuse to make lots of delicious goodies for my nearest and dearest. This year the bake-fest started early, with a marathon session of biscuit-baking, using recipes from the splendid Dr Oetker: German Baking Today. All in all, my German friend Mel, and I spent about 9 hours in her kitchen on an ueber-efficient production line of jollity, making batch after batch of biscuits.
 
As well as being one of the simplest of the recipes, I have to say that these delicious little nuggets were my favourites. Sweet and spiced in equal measure, they really say "Christmas is coming"...
 
Spicy glazed biscuits
 
Ingredients:
For the biscuits
250g/9oz plain flour
1.5 tsp baking powder
160g/5.5oz sugar
1tsp grated lemon zest
pinch salt
1 egg (medium)
1 pinch each ginger, cardamom, cloves, allspice, white pepper (all ground)
3-4 tblsp milk
25g/1oz ground almonds
25g/1oz finely chopped candied lemon peel
 
For the glaze
175g/6oz icing sugar
2 tblsp hot water
 
Method:
 
1. Mix together the flour and baking powder in a bowl, then add the sugar, lemon, salt, egg, spices, milk, almonds and mix together thoroughly.
 
2. Knead the dough on a lightly floured surface until very smooth. Divide the dough into two rolls, about 25cm/10in long. Wrap in clingfilm and refrigerate for several hours or overnight. I made four, smaller rolls, so that I could take one out a time later without them warming up too much.
 
3. Line a baking sheet with parchment and preheat your oven to 180 degrees celcius (Gas mark 4).
 
4. Reshape the rolls if they have gone flat on the bootom, then cut into slices approxiately 1cm in width. Arrange the biscuit coins onto the baking sheet, and bake for approximately 15 minutes.
 
5. Allow to cool on a wire rack.
 
6. For the glaze, mix together the icing sugar and hot water to make a thick, spreadale glaze, and coat the biscuits, allowing it to set completely.
 

Monday 5 November 2012

P...p...p...pick up a penguin!

One of the great things about being known as a fan of baking and cake decorating, is that I fairly often get asked by friends to make cakes for special occasions in their families. I always love it when this happens - there's only so much sugarpaste Mr P and I can eat, so having a good excuse for an artistic project for somebody else is always welcome.
 
Most recently, I was asked to create a small wedding cake as a surpise for a friend's sister- and brother-in law. I was told that the bride and groom were both big fans of cocktails, and that the wedding invitations had been sent out on reproductions of the title pages of Penguin romantic classics. What a great brief, eh?
 
Penguin cake topper
 
So the final product was a strawberry daiquiri-flavoured cake (lime and rum sponge sandwiched with home-made strawberry jam and strawberry and rum buttercream). With the help of my trusty pal Mel (who is experienced in the subject of sugarpaste penguins!) it was decorated with detailing from one of the book covers, and a penguin bride and groom cake topper.


Penguin wedding cake


The summer saw a couple of other good projects to get my teeth into. Mr P's Nan celebrated her 80th birthday in August with a big family get-together, so we decided to make up a batch of cupcakes to keep all of the guests satisfied. As well as a traditional lemon flavoured batch, we came up with a very popular cupcake flavour - tea and biscuits! This was done by brewing a tea bag in a dah of warm milk, and adding the milk together with just a smidgin of cocoa powder to a fairly standard sponge mix. Simple and effective! This left us with plenty of energy to focus on decorating all of the cupcakes.


And finally, last but not least, a friend of mine recently wanted to surprise her Mum, 'Dove', with a celebration cake for her 60th birthday. As her mother had somehow managed to sleuth out each and every one of her other birthday surprises, I was especially happy to be involved in this. And happily, the first she knew of it was when the cake turned up in front of her at the end of the evening!


Thursday 1 November 2012

Spicy green tomato and apple jam

A couple of weeks ago, Mr P and I stumbled across a rather wonderful community market garden, literally just around the corner from our flat. Quite an unexpected find, since this little oasis of freshly grown veg is situated in a plot of formerly derelict land directly behind the local co-op.
 
This presents a marvellous opportunity for us, since, despite having a fair-sized garden plot of our own, neither of us is known for our green-fingered prowess. More specifically, we're widely known as "the cactus people", because although we love plants, the only ones we've been able to successfully keep alive for any length of time are our growing family of cacti and succulents, lovingly named Cacky, Steve, Eccy Thump, Ecklefecken, Teddy, Spike, and Pineapple. Now, I realise I'm at risk of sounding unhinged and rambly. So let's get back to the point. The point is, our first trip to the community garden saw us come away with a veritable feast of scrumptious goodies to try, and this included a sad little bunch of green tomatoes that nobody seemed sure what to do with, but which resulted in a cry of "Green Tomato Chutney!" from yours truly.


In fact, after a flick through Mel's new book, "The Australian Women's Weekly Pickles and Chutneys", I decided to branch out a little and try out their green tomato and apple jam. Having had a sneaky test already (of course) I can advise it is entirely delicious in every way and would highly recommend that you give it a go.
 
This will make delightful stocking fillers this Christmas... if it lasts that long!
 
Spicy Green Tomato and Apple Jam, makes about 750ml
I've reproduced the ingredients from The Australian Women's Weekly Pickles and Chutneys below, with my adaptations in brackets, and my own instructions.
 
Ingredients:
3 large apples (600g), peeled
5 medium green tomatoes (500g), peeled, chopped (my tomatoes were of varying sizes, some to small to effectively peel, so I left the skins on and the jam didn't seem any the worse for it. I also had to add in a couple of red tomatoes to make up the weight)
250ml water
1/2 tsp ground ginger
1/2 tsp ground nutmeg
1 cinnamon stick
550g sugar, approximately
 
Method:
 
1. Chop the apples and combine in a saucepan with the tomatoes, water, ginger, nutmeg and cinnamon. Bring to the boil, then simmer, covered, for about 30 minuted until fruits are soft. Discard the cinnamon stick.
 
2. Tip the fruit mixture into a measuring jug and make a note of the amount. Then return the fruit mixture to the pan and measure out the same amound of sugar in the jug. Add this to the fruit mixture in the pan and then stir over a gently heat, without boiling, until the sugar is dissolved.
 
3. Bring the mixture to the boil, and boil it, uncovered for about 15 minutes without stirring, until the jam sets when tested. See this post for how to test for setting point.
 
4. Pour the hot jam directly into hot, sterilised jars and seal them whilst hot.
 
5. Decorate with festive ribbon, and Bob's your uncle!


Thursday 25 October 2012

Extra special chocolate layer cake

As a rather lazy baker, I tend to prefer recipes that call for few ingredients and simple instructions. So if I had read the recipe fully before starting this chocolatey scrumpster, then if I'm honest, I may well not have bothered. But that would have been a major loss.

Although this cake takes a little extra time and care than your average chocolate layer cake, it's really very much worth it. this cake is perfect or a social occasion, and it really shows that you care. It's rich but light, moist, delicious, and you can taste that extra bit of care and attention that go into it. Plus, it freezes like a dream, so if you're feeling inspired, you can make a double batch and have one on standby. Not bad, eh?!

The sponge recipe itself is adapted from the Chocolate Layer Cake recipe in Cupcakes from the Primrose Bakery. I have written the ingredients as listed in the book, and put my adaptations in brackets afterwards. Although the book recommends sandwiching the cake with chocolate or vanilla buttercream, I decided to be a little naugtier, and decided to go for a thick and delicious ganache instead. The plus points of the ganache are that it travels well if you're taking the cake to a party, and as mentioned earlier, it freezes and defrosts rather wonderfully, as long as you wrap it tightly in clingflim first.
 
Extra Special Chocolate Layer Cake
 
Ingredients:
 
For the sponge:
230g dark chocolate, 70% cocoa solids (I used 200g of 50% cocoa solids)
170g unsalted butter, softened
350g light soft brown sugar
3 large eggs, separated, 370g plain flour, sifted
1.5 tsp baking powder
1.5 tsp bicarbonate of soda
0.5 tsp salt
500ml semi-skimmed milk, at room temperature (I soya milk, and only 400ml because my chocolate had a lower percentage of cocoa solids than the original recipe recommended)
2tsp vanilla extract
 
For the ganache:
200ml double cream
250g dark chocolate, 50% cocoa solids
25g butter
 
Method:
 
1. For the sponge, break the chocolate into pieces and melt over a bain-marie, or in a microwave on a low setting. Set aside to cool slightly.
 
2. Cream together the butter and sugar until the mixture is pale and smooth.
 
3. In a separate bowl, beat the egg yolks for several mminuted and then slowly add into the creamed butter and sugar, mixing well. Then slowly add in the cooled, melted chocolate to this mixture, continuing to beat well.
 
4. In a separate bowl, mix together the flour, baking powder, bicarbonate of soda and salt. In a jug, add the vanilla to the milk. Add one third of the flour mixture to the chocolate mixture and beat well, then pour in a third of the milk and beat again. Repeat these steps until all of the flour and milk are incorporated.
 
5. In a clean, grease-free bowl, whisk the egg whites with and electric whisk until sot peaks start to form. Then carefully fold the egg whites into the main batter using a metal spoon.
 
Note: You need to do this carefully so you don't knock all of the air out of your whipped egg whites. The best way to do so, is by gently using a figure-of-eight motion to fold in the egg whites.
 
6. Divide the mixture evenly between two lined 20cm (8-inch) cake tins. You'll need fairly deep tins for this.
 
7. Bake for about 30mins in an overn preheated to 190 degrees celcius (170 degrees celcius fan/gas mark 5).
 
8. When the cakes are ready, leave them to cool in their tins for 10 minutes before turning out onto a wire rack to continue cooling.
 
9. Once the cakes are completely cool, you can sandwich them together and cover in ganache. Add the butter and milk to a saucepan and heat, stirring continuously. When the mixture begins to bubble, remove from the heat. Stir in the chocolate, broken into pieces, and keep stirring until the chocolate has completely melted in.
 
10. Let the ganache cool for about 5 minutes, so that it starts to thicken slightly and is easier to handle. Use a long palette knife to spread a layer of ganache over each of the cake layers. Allow it to soak in slightly, and when it is safe to handle, sandwish the cakes together, ganache sides together. Finally, cover the top and sides of the cake in the remaining ganache and allow to cool and set.


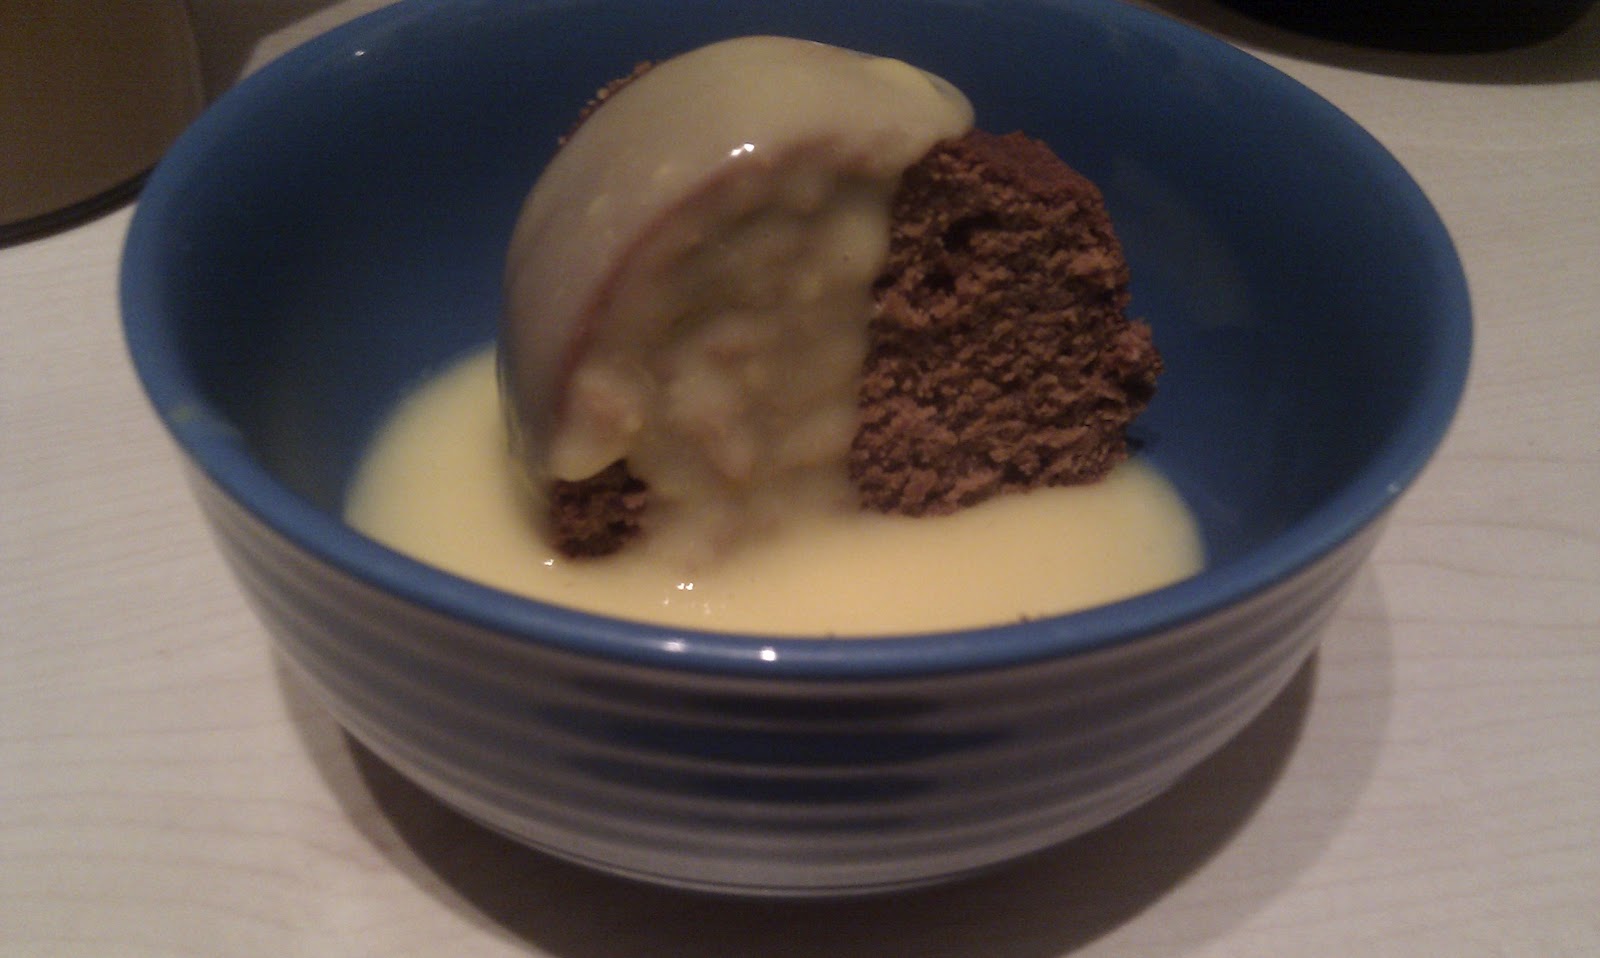
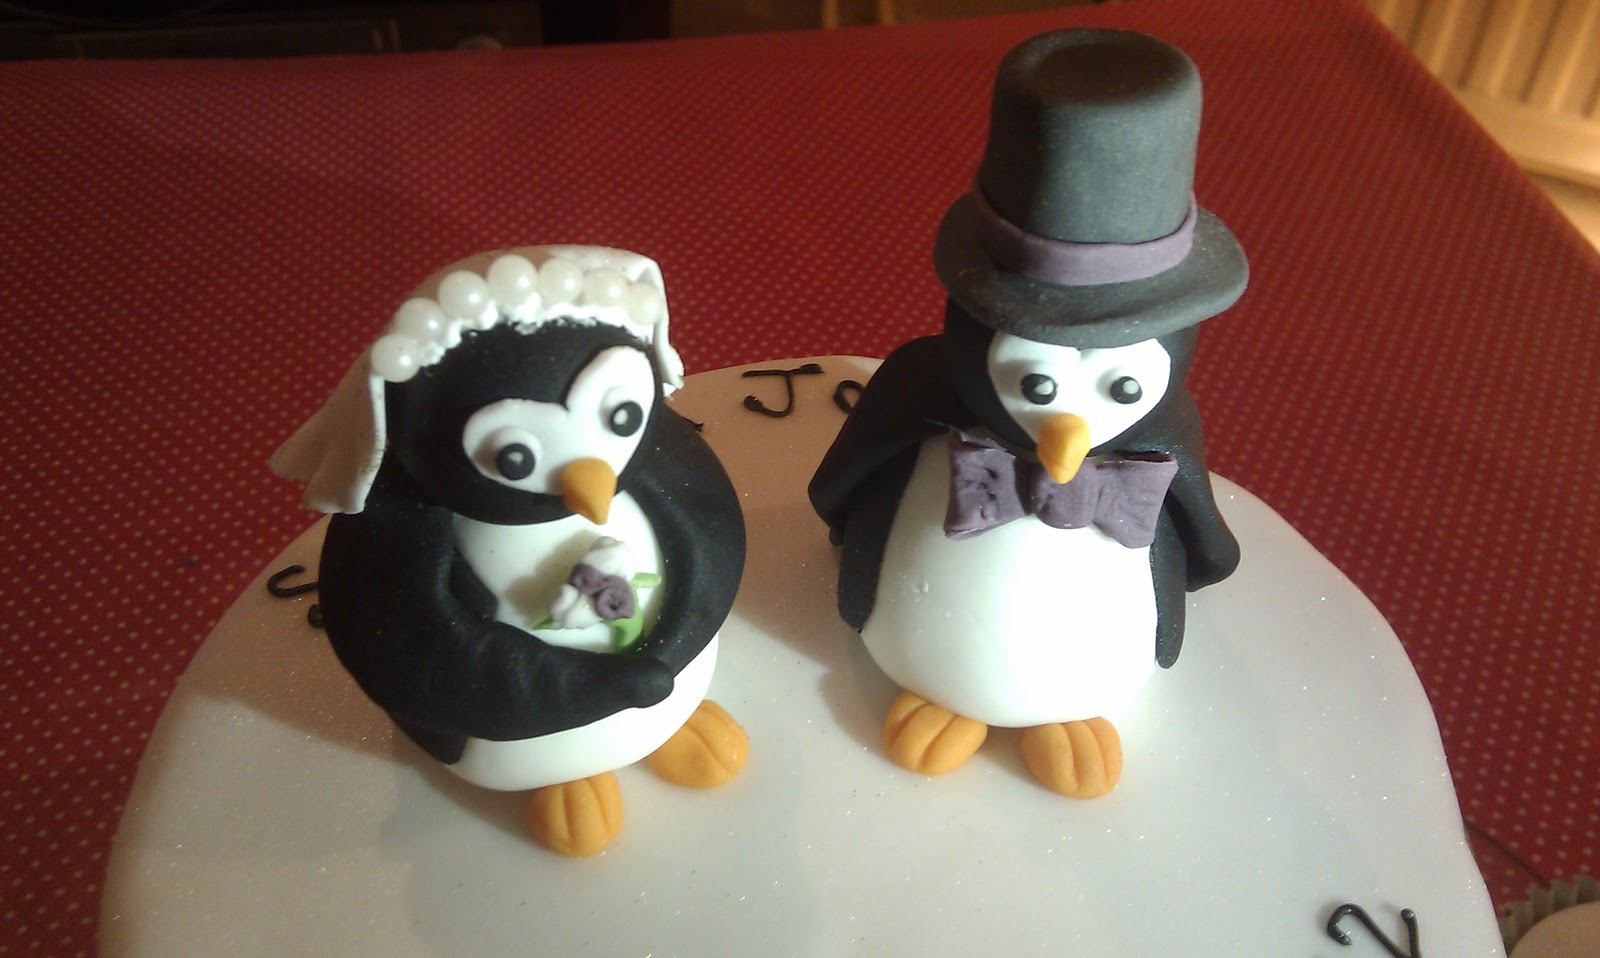
This makes a really rather maginificent and quite grown-up celebration cake that is guaranteed to go down a treat! I have baked this to celebrate my friends' recent engagement, to feed hungry housewarming attendees, and as a 'welcome home' cake. It's genuinely perfect for all occasions!


Sunday 16 September 2012

Kässpätzle

Apologies all for the long delay in posting - it's been rather hectic in P's kitchen of late. Well, more to the point, I haven't really had much of a kitchen due to our extended house move.
But - long story short - moving is now complete, so you can anticipate some rather lovely culinary adverntures coming up shortly. Here's the first, to fulfil a promise made long ago. It's the recipe for a traditional Swabian dish (from Southern Germany) that I wasn introduced to by my friend Mel. It's a carby, cheesy mouthwatering feast of naughtiness, which I am sure you will appreciate.
Spätzle
Ingredients:
(these are the pasta noodles that form the basis for the dish)


500g plain flour
5 eggs
200ml water
pinch of salt

Method:
1. Mix the flour, eggs, salt and some of the water together and beat in as much air in as possible, so that you get bubbles in the dough. Gradually add in as much water as necessary to gain a thick, sticky consistency (you probably won't need all of it). Mel rather appealing describes the desired consistency as being "like chewing gum".
2. Next comes the tricky part, for which a large potato ricer will come in handy. In the absence of a potato ricer, there is a cutting method, whereby you spread the dough on a wet board and then cut thin slices with a knife, as shown on this video: http://www.youtube.com/watch?v=-Y6Ga9hMm4Y
3. Next, the Spaetzle have to be cooked. Bring a large pan of water to the boil, and add the Spaetzle. When they float to the top, scoop them up with a slotted sppon.
The Spaetzle can be served as they are, in accompaniment to a meal, but my favourite recipe is Kässpätzle (cheesy spätzle):
Kässpätzle
Ingredients:
Spätzle from 700g of flour
200g Gruyere or Emmental cheese, grated 
250g Edam, grated
200ml single cream
Salt, pepper,  and nutmeg to taste
1 dried stock cube

Method:
1. Grease a large ovenproof dish, and spread half of the Spätzle across the dish. Season with salt, pepper and nutmeg, then cover with half of the cheese and cream.
2. Prepare a second layer in the same way, and bake for about 20 minutes at 200 decrees celcius (until light brown).
Röstzwiebeln
(Crispy onion garnish)
Ingredients:
onions (about 4-5 onions for 3 people)
handful flour
sunflower oil
Method:
1. Slice the onions and cover in flour, then brown in a generous amount of oil until most of them are crisp.
It might sound like a lot of complicated steps, but it's definitely worth it - that's what helps to make such a simple series of ingredients just so darn tasty.
And because I'm nice like that, I'm passing on an official Swabian Housewife's tip that Mel passed on to me: when you wash utensils use cold water, otherwise the dough won't come off!
Enjoy!

Monday 6 August 2012

Winter Vegetable Terrine


"What an odd choice of post for August!" I can almost hear you cry as you read that I'm about to launch into a very unseasonal recipe. Except, if you're surprised by the wintry tone of this post, then it means you're one of my overseas readers. If you're in the UK, I'm sure it won't surprise you at all, and you may well be in just as much need of some comforting grub as me. So, let's leave aside the horrible Manchester showers that got me wet through on my latest run (yes, dear reader, *run* - I'm sure it won't last!) and move seamlessly into the warmth and comfort of the kitchen, where the magic happens.

This recipe is adapted from one by the marvellous Mary Berry, as set out in her Complete Cookbook. If you don't have it, buy it - it's definitely the most well-consulted of the hundreds of cookbooks that I own. The amendments that I have made to her recipe are as follows:

1. I used turnip instead of celeriac, which Mr P turns his nose up at. It transpired that he wasn't too keen on the idea of turnip either, which is why a not inconsiderable amount of garlic and ginger were added to the middle layer - more of which later...
2. I was a bit too lazy to actually measure out the ingredients, so I guesstimated by vegetable size (I know, I know). I've listed both lazy measurements and precise Mezzah Bezzah measurements in the ingredients list below.

This is a super healthy veg injection, best served chilled. I found that it survived well in lunchboxes (see below), and was delicious with new potatoes. I also found that for those who find something so wholesome a little bit too goody-goody, this terrine is epic with a filthy dirty stilton sauce. Oops... I think I just dribbled on my keyboard a little bit there...


Winter Vegetable Terrine
serves 6

You will need a 1kg (2lb) loaf tin or terrine, oiled and lined with greaseproof paper on the bottom
Mary Berry's official ingredients come first [mine come afterwards]

Ingredients:
375g/12oz [3 large] carrots, coarsely chopped
2.5cm/1in piece of fresh root ginger, peeled and grated
salt and black pepper
375g/12oz celeriac [2 large turnips], peeled and coarsely chopped
375g/12oz [2 medium-sized heads] broccoli
sunflower oil for greasing
3 eggs


Method:
1. Cook the carrots for 10-15 minutes in boiling salted water until they are just tender. Mary Berry cooks them with the ginger, but I put the ginger with the turnip, to disguise it for Mr P.

2. Cook the celeriac/turnip in boiling water for 8-10 minutes until just tender.

3. Cut the stalks off the broccoli and cook for 8-10 minutes until almost tender, then add the florets and cook for another minute.

4. Drain all of the vegetables separately and rinse in cold water, then drain again, very well.

5. Blitz the broccoli well in a food processor with one egg, and some salt and pepper to taste. When the mixture is smooth, pour into the loaf tin and smooth the surface.

6. Blitz the celeriac or turnip with another egg and salt and pepper to taste. When a smooth puree has been achieved, layer on top of the broccoli and smooth.

7. Repeat this process with the carrots and the final egg. Smooth this final layer on top of the other two.

8. Tightly cover the tin with oiled foil and put into a roasting tin. Pour boiling water in to the roasting tin, to come half way up the sides of the loaf tin. Cook in a preheated oven for about an hour at 180 degrees celcius. When done, the terrine should be firm.

9. Remove the terrine from the oven and allow to cool in the loaf tin. Then chill thoroughly in the fridge before turning out to serve.


Friday 27 July 2012

Viennese Whirls

When I was a wee nipper, ours was never a particularly confectionary-heavy household. To this day, my Mum proudly tells stories of how I used to nibble at carrot sticks when the other kids were having sweets, and how, on warm days, I used to sit in a cardboard box in the garden, munching away on a bag of frozen peas. I'm pretty sure that this would be widely tutted at in today's society (by parties other than the vegetable-eating youngster, I mean), but that's not really the point...  

The point is, the first time I was introduced to some of the more spectacular-looking boxed confections, it made a pretty big impact. French Fancies seemed like cartoon goodies - out of this world - and Mr Kipling's Viennese Whirls were just about the ultimate in decadent chic.

So when I saw Mary-Anne on the Great British Bake off make her version of Viennese Whirls, 'Melting Moments', I knew I had to give them a try, and I've just been waiting for the opportunity to get around to actually doing it. I know that the buttercream she uses in the recipe is excellent, as I have used it in several recipes before, so I started out with very high hopes for re-living the sugar rush experiences of my youth.

Mary-Anne's original recipe can be found here, and is definitely worth a look, as is the rest ofher excellent blog. You will see by comparing her pictures to mine, that she's also a darn site better at piping than me. Hey ho, I'll live to pipe another day! For ease of reference, I've reproduced the recipe below, with instructions for making only a half quantity of the buttercream filling from the original recipe (which was ample for this amount of biscuits).


Viennese Whirls/Melting Moments


Ingredients

250g plain flour
58g cornflour
58g icing sugar
250g unsalted butter, room temperature
1 teaspoon pure vanilla extract
a little food dye (optional)


Method

1. Cream together the butter and icing sugar until very pale and fluffy. You will need to pipe it later, so take the hit now and do it properly, or your crampy fingers will never forgive you (I speak from experience here!)

2. Add in the vanilla extract and sift in the flour and cornflour. Beat together until the mixture is nice and smooth.

3. Spoon into a piping bag fitted with a star-shaped nozzle, and pipe out in circles on a lined baking tray. If you are conscientious, you may want to draw out the circles so that you get a good shape. If you want the distinctive coloured stripe on your biscuits, then paint a line of food dye down the inside of your piping bag before you fill it. Mary-Anne suggests matching the colour to the flavour of jam that you use in sandwiching them together. I've made them twice, once with strawberry jam, and once with a strawberry and blackberry jam that my Mum made - hence the batch of double-coloured biscuits.

4. Pop the biscuits in the freezer for 15 minutes to help them retain their piped appearance when you bake them. I only have a teeny overcrowded freezer box, so I tried putting them in the fridge for half an hour instead. It really didn't work as well, so bear that in mind if you do have the freezer option available to you.


5. Bake at 180°C  for 12 minutes, until the biscuits are slightly golden in colour.

6. Put the tray on a wire rack for a few minutes, and when the biscuits have cooled for a few minutes, remove from the tray and allow to cool completely on the rack.

7. Sandwich together with jam of your choice, and Mary-Anne's delicious 'depression era buttercream'. If you prefer the biscuits simple, leave them unsandwiched, and they will keep for about 4 days in an airtight container with no bother. Once they are sandwiched, though, they'll go soggy fairly quicky, so put them together when serving if possible.


Depression-Era Buttercream

(due to the cooling time needed, it may make sense to start this before you start the biscuits, just sayin').

Ingredients

125ml milk
2tbs plain flour
110g unsalted butter
110g caster sugar
1 tsp pure vanilla extract

Method

1. Gently heat the milk and flour, together on the hob, stirring continually with a whisk until the mixture thickens.

2. Continue cooking and stirring for another minute to get rid of the floury taste.

3. Pour the mixture onto a plate, cover closely with cling film, and allow to cool. The cling film will stop a skin forming. The mixture musst be totally cool before proceeding to the next stage, or your buttercream will end up as a melty, curdly mess.  

4. Beat together the sugar and butter until fluffy and pale in colour. 

5. Add the thickened milk mixture and continue mixing together until fully incorporated, pale and thick. Mary-Anne estimates that this will take another 10 minutes.

Sunday 15 July 2012

Strawberry Milkshake Rainbow Sponge

Last weekend my friend Beth celebrated her birthday with a children's party, which gave me the perfect excuse to make the rainbow cake I've been thinking about. Although this takes a lot of timely and careful preparation, the recipe itself is incredibly simple.

Ingredients:
You will need six 6" square cake tins and six bowls for mixing (small bowls will do). If you have fewer tins, you can re-use them. I used one of these marvellous adjustable tins.

For the sponge:
12oz/330g margarine
12oz/330g caster sugar
6 eggs
12oz/330g self raising flour
3 tsp baking powder
6tsp vanilla extract
6tsp strawberry flavouring
1/2 tsp each of gel food colourings - red, orange, yellow, green, blue and purple

 For the internal buttercream:
(recipe courtesy of Mary-Anne at Time to Cook Online)
This is lighter and less sickly than standard buttercream.
250ml milk
4 tbs plain flour
225g unsalted butter
225g caster sugar
1 tsp pure vanilla extract

For the external buttercream:
This gives a sturdier buttercream for the outside of the cake.
200g unsalted butter
200g icing sugar
1tsp vanilla extract
1tsp strawberry flavouring

To decorate: An assortment of rainbow-coloured children's sweets. The ones on this cake are all suitable for vegetarians (no gelatine or cochineal).


Method:
1. Grease and line your tins. Pre-heat the oven to 180 degrees celcius.

2. In each of your bowls, cream together 2oz/55g margarine with 2oz/55g sugar until light (almost white) in colour.

3. Beat togther one egg with one of the colourings, and gradually mix in to one portion of creamed butter and sugar. If the mixture starts to curdle, add in a little of the flour.


4. Repeat this process, adding coloured egg to as many of the bowls of cake mixture as you will be able to bake in the first batch.

5. Stir in 2oz/55g flour and 1/2tsp baking powder into each of the batches that are ready to be baked, adding 1tsp each of vanilla extract and strawberry flavrouing at the same time.

6. Put each prepared portion of cake mixture into one of the prepared tins and bake for 15-20 minutes at 180 degrees celcius.


7. Allow the baked cakes to cool thoroughly on a cooling rack. Meanwhile, start preparing the internal buttercream. Whisk together the milk and the flour in a pan on the hob until the mixture thickens. Continue cooking and stirring for another minute to cook out the flour.

8. Pour the mixture onto a plate and cover closely with clingfilm so that a sking does not form. Allow to cool completely.

9. Beat together the sugar and butter until creamy and pale in colour. Add the milk mixture when it is completely cooled, and the vanilla extract. Continue wisking until the mixture is pale and thick.

10. Sandwich together the six layers of cake with the internal buttercream, starting with the purple on the bottom, and working up to a red top layer.

11. Prepare the external buttercream: Whisk together the butter and icing sugar until very light and pale in colour. Whisk in the vanilla extract and strawberry flavouring.


12. Cover the outside of the cake with the external buttercream and decorate with the colourful sweets.


Try and keep the exciting insides a secret, and wait for the gasps of excitement when the recipient finally cuts the cake!

Sunday 8 July 2012

The Bake-it list

Have you seen the film The Bucket List? Basically, the two main characters write a list of all the things they want to do before they die, and set of crossing everything off.

Now although baking and dying don't go hand in hand for me (thankfullly), I nonetheless thought that it might be a rather nice idea to commit to the page all the things that I keep saying I'd like to have a go at making, to encourage myself to branch out, rather than making hundreds of increasingly random cakes and cupcakes, which seems to be my default setting. I may well add to or update this list over time, but for a starter, here's my bake-it list for the rest of 2012, in no particular order...

1. Meringue. I have never actually made meringue, but my mum used to make me little meringue mice with sugar string tails when I was a nipper. I'd almost forgotten about them until I was in a cake shop last year and saw a tray full of meringue mice and had a chilhood flashback. So maybe meringue mice, and maybe just meringue in general. We'll see.

2. Viennese Whirls. I used to like the Mr Kipling variety of these when I was younger, and ever since I saw these on one of my favourite blogs, Time to Cook Online, I have been obsessed with the idea of making some. [27th July 2012]

3. Spinach roulade of some description. I like it when savoury goods look as delightful as sweet ones.

4. Vegetable terrine. It seems like an awful faff, but I love the simplicity of the terrine form, even if I don't like the idea of how complicated it is to make. Anyhoo, Mary Berry has a bit to say on these, so I shall trust in her expertise and give it a go!

5. Bread. Proper bread that I've kneaded myself, and not the cheaty Beer Bread that I tend to favour (basically, whack a bottle of beer and some flour into a tin in the oven), and not produced in the bread machine. I really love the idea of home-baked bread, but never make it for a series of reasons. Firstly, I've got a recurrent issue with tennis elbow, so kneading isn't my favourite hobby, and even sugarpaste kneading can be painful. Secondly, and probably most importantly, I am hideously impatient. The idea of waiting for the dough to proove fills me with the jitters. But I'll get over it, right? Also... foccacia.

6. Praline. Despite my preference for making sweet treats, I'm not such a big eater of them. However, there are two sweet treats that I would choose over savoury ones any day. The first is creme brulee. The second is praline. Food of the gods! Highly naughty, decadent, calorific, and entirely satisfying. My mouth is watering even now...

7. Rainbow cake - 7 layers, each a different colour (?and flavour?). What's not to like? [15th July 2012]

8. Savoury cheesecake. I have actually made this before, but I pulled the oven shelf out too enthusiastically, and it turned upside down on the bottom of the oven. Gutmans. Definitely worth another go though. Probably involving spinach, and maybe pine nuts.

9. A coffee and walnut cake that people will enjoy. No, I'd probably never choose it myself, either, but I like the idea. Hopefully decorated with chocolate covered coffee beans.

10. ???????????

I've decided not to add an arbitrary tenth target, but I am very much open to suggestions. So if you have any ideas for what other recipes you would like to see on my blog, then please feel free to comment below!

Friday 29 June 2012

Macaroni 1: Meltdown 0!

Ladies and Gents, I have to warn you that this post may take on the form of a bit of a rant. It's been a funny few days; an emotional rollercoaster, some may say. And not due to anything specific, either. Just the culmination of a hundred little niggling issues which combined to induce a melodramatic meltdown of epic proportions, which it turned out that only food could cure.

I'm very aware that committing any of these minor catastrophes to writing will decrease their significance to the extent that my reaction will make me feel psychologically unhinged. However, suffice it to say that after hearing (after 3 weeks of to-and-fro phonecalls; actually, mostly to- and not much fro) that the passport office have lost my marriage certificate (apparently due to posting it back normal delivery, even though I paid for courier service), then rushing to source a last-minute van after finding out that my Dad wanted his house move to take place this weekend, only to be informed by Mr P that we've got guests coming ("I told you weeks ago!"/"I'm pretty sure you didn't!"), organising the time off to do the move early next week instead, then finding that Dad had already roped in extra 'volunteers' for Saturday, but managing to put them off as nicely as possible, then finding out that next week's conference paper, whch I thought was 90% done, was actually 18 pages of vapid nonsense, I was not in the best of spirits.

But hark! What is that I hear? Is it the sound of an email notification from Schuh alerting me to their 25% off sale? And lo! Do my eyes deceive me, or are the shiny red lovelies that I have been aspirationally referring to as my "Birthday shoes" included in said sale? Could it be that my day was suddenly taking a turn for the much, much, better?

Erm, no. Because they only had three sizes left, and mine wasn't one of them. Cue: meltdown!

In a situation like this, there is only one cure: comfort food, and lots of it.

Meltdown-busting Macaroni cheese
(serves 2)

Ingredients:
2 cups dried macaroni
1 des sp butter
2 tblsp sunflower oil
1 des spoon plain flour
2 cups milk (I used soya milk)
3 des spoon nutritional yeast
1/2 dessert spoon paprika
1/2 tsp mustard powder
good shake of black pepper
grated cheese (mature cheddar) a block about 2cm x 2cm x 8cm (you can't be expected to wigh such things when you are having a meltdown)


Method:
1. Cook the macaroni in boiling water as per the instructions on the packet - don't over cook it though, as it should be a little al dente.

2. Melt the butter in a saucepan over a moderate heat, then add the oil. Stir in the flour and mustard powder to form a thick roux.


3. Add in the milk, stirring continously, then stir in the paprika, pepper, and nutritional yeast.

4. When they are all blended in well, stir in the grated cheese. If the meltdown is serious, you may wish to grate some more to sprinkle over the finished dish as a protest against class and decency (I did).

5. When the macaroni is cooked, remove both pans from the heat. Drain the macaroni thoroughly and add it to the pan of cheese sauce, and mix until all of the macaroni is completely covered.

6. Serve in a large bowl, and eat with a big spoon. You will feel immediately a lot better.

7. If you're not quite up to 100% mental fitness after the macaroni cheese, then fry up a big batch of popcorn with inordinate amounts of salt, and treat yourself to a teacup of Galliano vanilla liqueur on the side.

What?! Are you looking at me funny?

No, seriously, I'm better now.

Or am I?

Yeah, honestly I am.

Sunday 24 June 2012

Jamaican Ginger Cake #1

Last weekend, Mr P and I were mostly dining out at the expense of others, and I have to say that if there's one thing in the world that's better than cooking for your friends, it's being cooked for by them! Sunday night saw a flithy dirty German (Swabian, actually) cheese fest, courtesy of Mel. I'll leave the teaser at that, for now, as I fully intend to post her recipe for Spaetzle (home-made fat pasta noodles baked with cheese into nightly calorific guilty goodness) in the not too distant future.

Friday night was an evening of firsts. We were invited round to experience Messner's very first attempt at Lasagne (and a veggie one, to boot!). Despite being a bloody good cook, there are probably numerous reasons why he's never attempted Lasagne before, not least because he's got a weird, almost phobic dislike of cheese. I kid you not. Apparently, it was the first time he'd bought cheese, and grating it gave him the shudders.

 
For me, there were also a  few firsts - for one, I found out that it's possible to take aerial acrobatic/silks classes just down the road from us... and was alerted to the fact by the multi-talented (and at this point, leotard-clad) artist Sarah, or  Juggler Sarah, as I like to think of her. Two more firsts for me - I'd never before tried Lasagne with a creme fraiche-based white sauce in it (and can now highly recommend), but it was also my first attempt at a Jamaican Ginger Cake.

So why the #1 in the post title, then? Well, whilst this cake was definitely gingery, spicy, and moist, it didn't quite have the requisite 'sticky' quality that I always associate with Jamaican Ginger Cake, probably because I ran out of treacle, and couldn't put nearly as much in the batter as I'd been planning. So, with that caveat, here's the recipe I used. If you want to give this a try, I'd highly recommend adding more treacle, perhaps half as much again, or even double what I used.


Jamaican Ginger Cake #1
Ingredients:
400g plain flour
2tsp baking powder
2tsp cinnamon
1tsp nutmeg
5 cloves, crushed
2tsp ground ginger
250g butter or margarine
210g soft dark brown sugar
4tblsp grated ginger
200 ml milk
85g treacle
3 eggs, beaten


Method:
1. Preheat the oven to 180 degrees celcius, and prepare your cake tin. A large loaf tin would be the traditional receptacle, but I used a 25cm Bundt tin, to be a bit different. Sieve togther the dry ingredients into a large bowl (this does not include the grated ginger).

2. Melt together the butter and treacle in a saucepan on the hob. When melted, remove from the heat and allow to cool for a few minutes, then gradually stir in the milk. This will help to reduce the temperature futher so that the eggs don't cook when you add them.

3. Next, add the eggs to the liquid mixture, beating continuously. Stir in the grated ginger.

4. Gradually mix the liquid mixture into the dry mixture, stirring to form a smooth batter. Transfer the cake mixture to your prepared cake tin, and bake for around 40-50 minutes, depending on the kind of tin you used. Mine took about 45 minutes. You can leave it to cool on a wire rack, but there is definitely something to be said for serving it whilst it's still warm.


5. This moist cake is yummy on its own, or is also great served with a cup of tea. However, harking back to the old shared house days when Messner would return from the corner shoup with a Jamaican ginger cake and a tin of custard, I'm afraid we did the unthinkable with this cake....


...and it was yummy. Go on, try it... I dare you!

Friday 15 June 2012

Everyone's a fruit and nut case!

Perhaps controversially, my Dad has always been a major fan of Cadbury's Fruit and Nut. Probably not the most popular of the Cadbury's range (I'm a fan of their Turkish delight, myself), but there's certainly a time and a place for it. And given that he will be celebrating his birthday this year with a trans-Atlantic adventure, we had a pre-birthday celebration before he left, for which this themed cake was created. Anyway, this week is his actual birthday, so it seems an appropriate time to post the recipe.

The best thing about it is the texture. It's so fluffy and light, you'd almost think I had cheated by injecting it with some of the more disgusting fats and gelatines favoured by many of today's cake manufacturers. But rest easy, this cake is made of all good stuff. In fact, my Dad's verdict was that "This is the best birthday cake I've ever had". Not bad, given that it's his 80th!


Trip layered chocolate, fruit and nut cake
Serves 6-8
You need 3 x 8" sandwich tins (I only have two so I reused one, mixing a third of the mixture after the first two were in the oven!)

Ingredients:
4.5oz/125g caster sugar
1.5oz/40g muscovado sugar
6oz/170g baking margarine (Stork)
3 eggs, beaten
4.5oz/125g caster sugar
1.5oz/40g cocoa powder
1.5oz/40g ground almonds
a splash of milk (I used Alpro)

For the Buttercream:
2oz/55g baking margarine (Stork)
2 tablespoons cocoa powder, sieved
2 tablespoons icing sugar, sieved

To decorate:
raisins, chocolate chips, chopped nuts

Method:
1. Cream together the sugar and the margarine until light and fluffy.

2. Stir in the beaten egg, a little at a time, mixing thoroughly.

3. Stir in the flour, cocoa and almonds, and add a splash of milk if the mixture isn't wet enough.

4. Divide the mixture equally between your tins and bake at 180 degrees celcius for about 15-25 minutes. Leave to cool on a wire rack.

5. For the buttercream, cream together all of the ingredientsroughly, then whisk with and electric whisk until light and fluffy.

6. When the cakes are totally cool, sandwich together with the buttercream, spread a layer of buttercream on the top and decprate with fruit, nuts and chocolate.

Everyone's fruit and nut case... triple layered chocolate, fruit and nut cake

7. Scatter it with as many candles as it can safely hold, sing the birthday song at the top of your voice, and enjoy!