Monday 30 January 2012

Squash and Butterbean Arancini

Recently I had my Dad come to stay, and as he's not as committed to getting his five-a-day as I might have hoped ("I eat vegetables a couple of times a week, I don't know what all the fuss is about!") I had to think of a way to fool him into eating them. He really loves butterbeans, so I thought a butterbean-based risotto might just do the trick.

Now because risotto takes so much time and attention, I never make it in anything less than a mammoth batch, freezing any excess for future dinners. And this means that I often have the raw materials in for the naughty delight of arancini... little fried rice balls with a gooey cheesy centre.


The risotto itself is a pretty good value meal, but since the arancini are made up from its leftovers, they're basically free food. I've submitted both to the Frugal Food Friday blogroll, hosted by Fuss Free Flavours.


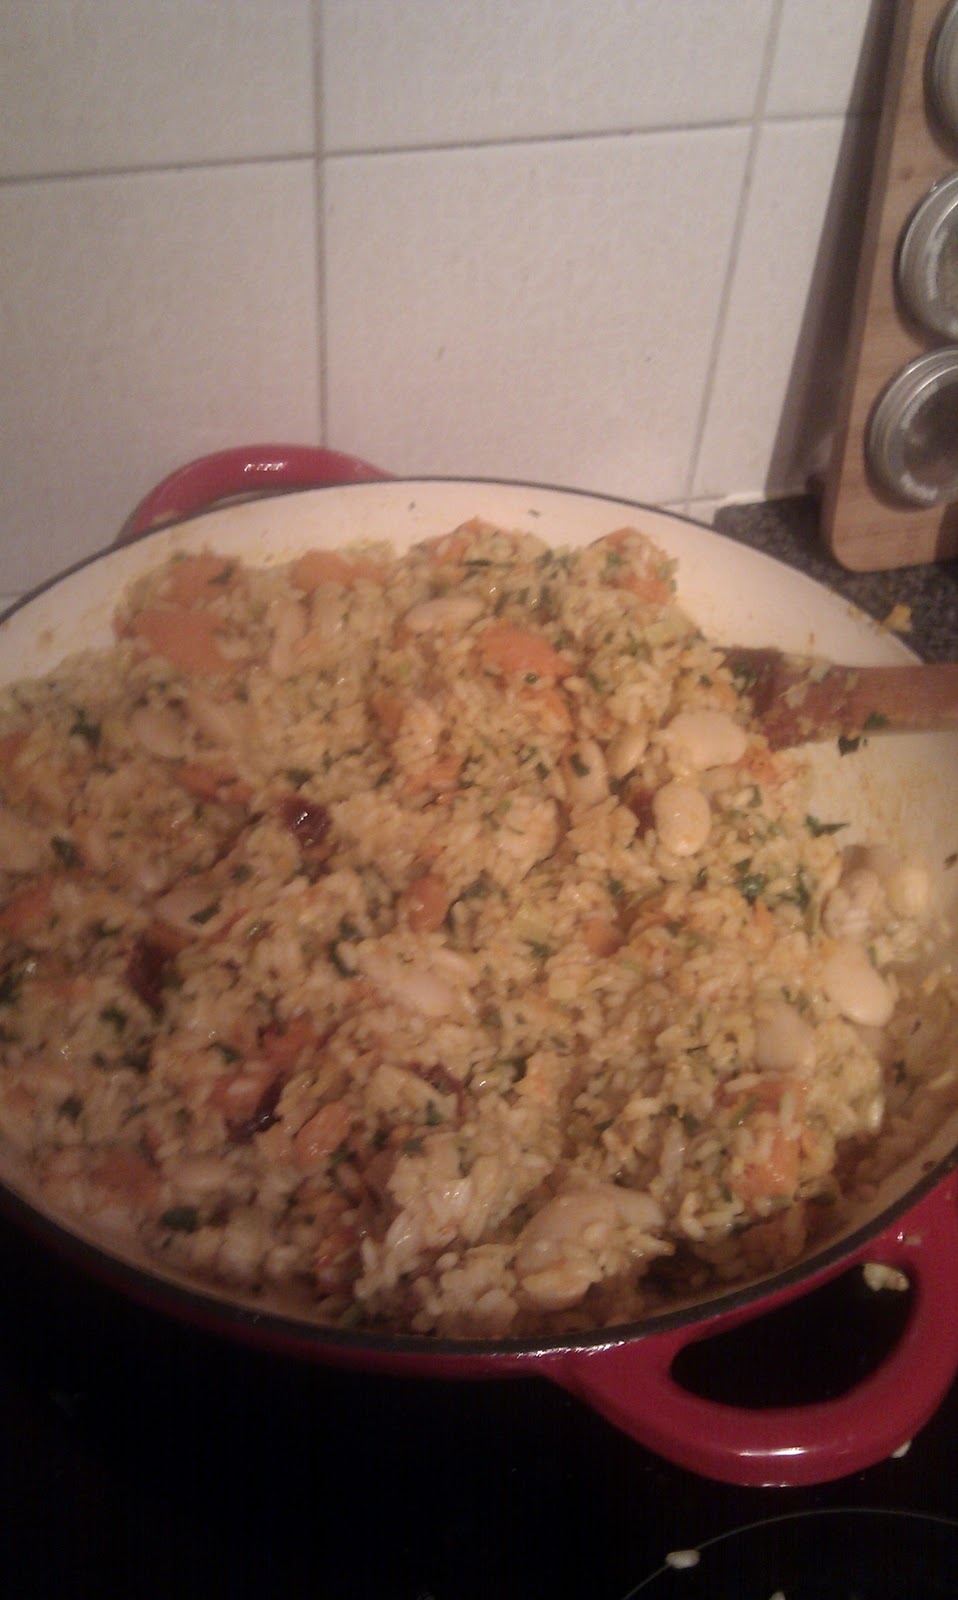
Squash and Butterbean risotto
serves 4-6

Ingredients:

1 medium-sized squash (butternut, acorn or any small-ish squash work well)
1 tin butterbeans, drained
1 large onion, chopped
1 leek, chopped into rings
3 cloves garlic, crushed
knob butter
4-5tblsp olive oil
5-6 sundried tomatoes, chopped into sixths
2 cups risotto rice
1 litre good vegetable stock
small handful chopped fresh sage (or 1tsp dried)
tablespoon fresh rosemary (or 1/2 tsp dried)
tablespoon cider vinegar (optional)
salt and black pepper


Method:
1. Chop your squash in half, remove the seeds and scatter them across a small baking tray, and sprinkle with salt and pepper. Place your squash, cut-side down, on another baking tray. Add about 1cm depth of boiling water to the tray with the squash on and pop both trays in the oven at 200 degrees celcius. The squash will take about 20minutes to become tender, but you should check the seeds after ten minutes and give them a good shake about. The seeds will be done when they are no longer moist, but crisp and golden on the outside. When the seeds are done, set them to one side to cool. Meanwhile, prepare the rest of the ingredients.

2. Melt the butter in a large pan with a tablespoon of the oil, then gently fry off the onion for a couple of minutes before adding the leek and garlic and frying for another minute or so.

3. Add the sage, rosemary, tomatoes and rice, and keep stirring for a couple of minutes until the grains and coated in the buttery oil, and all the ingredients are evenly mixed together

4. Next, start adding the stock, a little at a time, and stirring continuously until it is completely absorbed. When you have added half to three quarters of the stock, it's probably time to retrieve the squash from the oven. Let it cool until you can safely handle it, and while you are waiting, add the butterbeans to the risotto with some more stock, stirring continuously. 

5. Using a dessertspoon, scoop out the tender flesh of the squash. It should be pretty much cooked. I like to keep it in fairly large chunks for texture. You can add it straight to the risotto with any remaining stock and the cider vinegar, if using. Stir until all liquid is dissolves, season with salt and pepper, and serve immediately. Alternatively, you can allow this to cool and freeze it to eat later.

Squash and Butterbean Arancini
Makes 15-20

This recipe works with any leftover rice or risotto dish. However, it tastes particularly good with this risotto due to the sweetness of the squash, and the slight bite of the cider vinegar. These arancini do end up a little larger than usual though, as they have to accomodate whole butterbeans.


Ingredients:
2 cups leftover squash and butterbean risotto
15-20 1cm cubes of cheddar cheese
handful grated cheddar cheese
6-8 slices bread, as breadcrumbs
4tblsp vegetable oil

Method:
1. Mix about a third of the breadcrumbs into the risotto, together with the grated cheese, and mould this into balls about 2-3cm across.

2. Insert a cube of cheese into the centre of each ball, and roll the balls in the breadcrumbs.

3. Heat the vegetable oil in a frying pan, and shallow fry the balls for about 5mins, until golden brown all over. When done, sit on a piece of kitchen towel to absorb any excess oil.

4. Serve immediately. These are delicious served as a main meal in a tomato sauce, or accompanied by a peppery rocket salad and tomato pasta salad.


Inspired? Check out some more frugal recipes...


Sunday 29 January 2012

Hasselback potatoes

How's that for an incentive?
This week, I have mostly been working from home - wading through a giant stack of undergraduate exam papers. I feel that this kind of task is best met not in an office full of people, but in velour joggers* on a large sofa, with tea on tap and access to periodic 'incentives' (such as this morning's elevenses - a slice of my yummy Christmas cake).


Anyhoo, earlier this week as a little reward for getting through the first batch, I decided to act on a colleague's tip about Booth's supermarket. I'd never heard of it before, but when she painted it as a paradise of obscure and wonderful culinary delights, I knew I'd have to take the trip out there. It would have been nice to get out of the house anyway, but the whole trip took on the air of pilgrimage when I made what I consider to be one of my most significant foodie discoveries ever... Vegetarian Parmesan, by Bookhams. It comes in a lovely big hard wedge, unlike the 'free from' powdered version. They can't actually call it Parmesan due to European rules, so it's called Vegetarian Pasta Cheese instead - made with vegetarian rennet.

Now of course this discovery deserves a fancy-schmancy application, probably courtesy of Hugh F-W's River Cottage Veg cookbook. And that will come in a few days.

But in the meantime, let's go back to basics with a Mary Berry recipe that basically cooks itself, leaving you free to sit trundling though stacks of essays to your heart's content. This comes from Mary Berry's Complete Cookbook. I was introduced to the 2003 edition by my old friend the jazz trumpeter and have never looked back. It's a brilliant reference work of pretty much every well-known recipe you could want to make, from Cinnamon buns to Teriyaki and Nasi Goreng to Vegetable terrine. The new edition is currently available for pre-order on Amazon, so if you don't yet own a copy - go out and buy it at once!

*Yes, velour. I simply couldn't part with them after the ill-advised velour tracksuit phase of about ten years ago, so now they come out as a guilty pleasure at marking time. Judge if you want.

Hasselback potatoes
Allow one large potato per person as a side dish, or two as a main meal with a side salad.

Ingredients:
large potatoes (as many as necessary)
one knob of butter, melted per each two potatoes
salt and pepper
Parmesan cheese, grated - enough to sprinkle over each potato

Method:
1. Cut a thin slice of the bottom of each potato so that it will sit flat on a baking tray. Push a skewer through the potato length-wise, a quarter of the way up the potato.

2. Make vertical cuts, three-quarters of the way through the potato, at roughly 5mm intervals. You can just cut all the way down to the skewer without worrying about not accidentally chopping all the way through. Remove the skewer and prepare the rest of the potatoes in a similar way.

3. Put the potatoes on a baking sheet, and brush with the melted butter, making sure that it goes down all the cracks. Season with salt and pepper.

4. Bake in a preheated oven at 220 degrees celcius for about 40 minutes, then sprinkle the parmesan on top and bake for another 10 minutes.

5. Serve at once!


Monday 23 January 2012

Oligarch's Shortbread

Now, I don't know if your average oligarch likes shortbread. But I've been experimenting with this particular bake for a long time - Millionaire's Shortcake, Caramel Shortbread - whatever you like to call it. I've come to the conclusion that this particular version is about the richest formulation you could manage, hence the name. This is dangerously good.

Ingredients:
For the shortbread:
8oz salted butter (softened)
4oz golden caster sugar
12oz plain flour

For the caramel:
5oz butter or Stork
5oz light muscovado sugar
1 tin condensed milk (just under 400ml)
3tblsp golden syrup
1/2 tsp treacle
6pieces Cadbury's caramel (about 50g)


For the topping:
260g chocolate - I used half each of milk chocolate and dark chocolate
optional - gold edible glitter
optional - handful crushed nuts (almonds and hazel nuts)


Method:
1. Line a 30cm square deep baking tray or Swiss roll tin.

2. For the shortbread, cream together the butter and sugar, then mix in the flour to form a claggy paste. Splodge this evenly over the base of the tray, then pop in the fridge for 15-20 minutes. This will ensure that it has a good bite when it cooks.  

3. Prick all over with a fork and bake at 180 degrees celcius for about 20 minutes, until light golden brown in colour and allow to cool completely.

4. For the caramel, gently heat all of the ingredients (except the caramel chocolate) in a pan on the hob. Simmer for about 10-15 minutes until thick. Allow to cool for a couple or minutes, then stir in the caramel chocolate. Pour the caramel over the shortbread, allow to cool and refridgerate when cool.

5. Finally, melt the chocolate in a bain marie and use it to cover the shortbread.

6. For a treat to make a real oligarch happy, sprinkle gold edible glitter over the top - or a handful of chopped nuts for a bit of extra texture. Or both, if you're indecisive like me:

7. Chop into bite-sized chunks and enjoy!


Saturday 21 January 2012

Head Over Heels for Hugh F-W

As promised after the Christmas haul, I am resting my experimental side a little at the moment to try and stick to some of the recipes of the professionals. Unable to make the decision over which recipe to follow first, I left the decision to my significant other. The River Cottage Veg cookbook has so many new and exciting recipes in... what would he choose?

Would it involve kohlrabi, jerusalem artichoke, chicory or chestnuts? Would it have an exotic name like Tourte de Blettes, Caponata or Baba Ganoush?

Well, dear reader... his choice involved neither unusual ingredients nor exciting name. I bring you:

Hugh F-W's Upside-down onion tart (serves 4)

Ingredients:
200g all-butter, ready-made puff pastry
3-4 medium onions
small knob butter
1tblsp olive oil
1 tblsp balsamic vinegar
sea salt and freshly ground black pepper

Method:
1. Find an ovenproof frying pan, about 20cm across. I used a cast iron risotto pan. Preheat oven to 190 degrees celcius.

2. Roll out the pastry to a 3-4mm thickness and a cut a circle to match the diameter of your pan (draw around the pan lid if this makes it easier). Wrap the pastry disc in clingfilm and put it in the fridge.

3. Peel the onions and slice each one into 6 or 8 wedges, keeping them attached at the root end. Heat the butter and oil in your pan and add the onions to the pan in a concentric pattern, over a medium heat.

4. Sprinkle with salt and pepper and cook for about 15-20 minutes, turning once or twice, until they are tender and starting to caramelise around the edges.

5. Trickle the balsamic vinegar over the onions and cook for a couple of minutes more until the vinegar reduces a little. Remove from the heat and make sure the onions are spread evenly around the pan.

6. Lay the pastry disc over the onions and put the pan in the oven. Bake for abour 20 minutes, until the pastry is fulled up and golden brown.

7. Flip the tart over on to a plate, so that the onions are on the top. Serve immediately.

This is a nice and simple recipe that looks really impressive on a plate. The onions take longer to caramelise than you might think - so get them to your preferred colour on the hob, before you put them in the oven, as the colour won't change much once they're in the oven. But despite being a little pale, this was yummy!

Thursday 19 January 2012

Moroccan style stew (tagine?)

There's something very comforting about a good old stew. And if said stew has the delicious scent of cumin, coriander, cloves, fennel, ginger... and a whole host of other tongue tingling mouth waterers, you know you're onto a winner.

Not that I want to toot my own horn, but this recipe is blinkin' marevellous.

Toot toot!

Ingredients:
2 tsp cumin seeds
2 tsp coriander seeeds
1 tsp cloves
1/2 tsp fennel seeds
1 tsp chilli flakes
1/2 tsp cayenne pepper
1/2 tsp ground ginder
generous pinch ground cinnamon
2tsp paprika
1 onion, chopped
3 cloves garlic, finely chopped
1 courgette, roughly chopped
1 tin chick peas, drained
1 tin chopped tomatoes
1 cup Camargue (red) rice
good handful dried apricots and other dried fuit if you wish (I included cranberries and dates)
handful dried soya chunks


Method:
1. Rehydrate the soya chunks as per instructions.

2. Dry fry all the ingredients from the cumin seeds to the fennel seeds for five minutes over a moderate heat, stirring frequently. Crush to powder in a pestle and mortar

3. Add the remainder of your spices to the ones you have ground, and mix together.

4. Fry the onion, garlic and chilli flakes and garlic for 2 minutes, then add the spice mix, rice, courgette and soya chunks. Fry for 5 minutes then add the chick peas and the fruit.


5. Add the tomatoes, and a cup of water, then half-fill the tomatoes tin with water and add that.


6. Simmer for 20 minutes and serve with couscous, or alone as a stew.


I repeat: Toot toot!


Saturday 14 January 2012

New Year's resolutions...

After a very relaxing Christmas and new year, the time has come to get back to the blog, and what better way to start than with some resolutions?

The problem is, I'm sceptical about the whole ethos of resolutions, because if a thing's worth doing, then why wait until a new year to put the effort in? In fact, this year, the closest I have come to making a resolution is cancelling my gym membership. "Cancelling?" you may ask, perplexed as to why I'm not off on a treadmill trotting off the excess Christmas upholstery. Well yes. I have decided that my membership money can be far better spent on things other than lining the pockets of a soulless fitness corporation (ingredients maybe), so just before Christmas I cancelled my membership with the intention of running outdoors (for free). I hate running, though, so we'll see how it goes.

Anyhoo, the upshot of this is that I'm going to have to take the emphasis off the naughtly baking projects and put far more effort into the healthy and delicious everyday staples that won't force me into unnecessary pounding of the tarmac. Judging by the splendid haul of culinary paraphernalia that Christmas (and the January sales) brought me, we could definitely be in with a chance....


The only problem is that I am far too impatient to stick to recipes. If you're a follower of this blog, you'll know that nine times out of ten I like to make it up as I go along and see what happens. Cookery books are great, but I use them more as reading books for inspiration, rather than as instructions.

So maybe that could be my resolution - maybe I'll try to be patient enough to actually follow some recipes from start to finish and see where it takes us.

In the meantime, here's the filled pasta recipe for the first thing I made with my pasta roller. The filling's my own, but I did at least follow Gino D'Acampo's recipe for the pasta itself....

Danish Blue and walnut mezzalune in a sage an thyme truffle oil

Serves 4
Ingredients
For the pasta - from Gino D'Acampo - "Gino's Pasta"
300g strong white flour
3 medium eggs
1/2 tsp salt
1 tblsp extra virgin olive oil

For the filling
125g danish blue cheese, finely chopped
6 walnuts, roughly bashed up

For the dressing
Generous knob butter
2 cloves garlic, finely chopped
tblsp olive oil
2 tblsp truffle oil
tblsp fresh chopped thyme
tblsp fresh chopped sage

Method

1. For the pasta, sift the flour onto the work surface, and make a well in the centre.


2. Gently whisk the eggs and in a jug with the oil and the salt and pour into the well, gradually mixing in the flour until the dough reaches a crumbly texture.

3. Knead for about 8 minutes until it reaches a smooth texture, cover with cling film and leave to rest in the fridge for 20 minutes.

4. Whilst the pasta is resting, you can chop the Danish Blue and the walnuts for the filling, and mix it together. You can also prepare the herbs for the dressing.

5. Roll out the pasta as thinly as possible - a pasta machine will make this considerably easier, just make sure you keep it well floured so that it doesn't stick.

6. Use a round pastry cutter to cut your pasta into rounds (the larger cutter you use, the easier your life will be). Pop a teaspoon of the filling on each of the pasta rounds, wet the outside edge and fold in half to make little half moon shapes.

7. For the dressing, melt the butter with the olive oil over a low heat. When the butter has melted, add the garlic for a minute or two. It shouldn't be cooked as such, just no longer raw. Then add the herbs for a minute, turn off the heat and add the truffle oil.

8. Cook the mezzalune in salted boiling water for about 3 minutes, drain, and tip into the pan containing the dressing to make sure they are well covered, and serve immediately on a bed of baby leaves.