Wednesday, 25 April 2012

Bonjour, les Macarons!

Macarons? Aren't they hideously complicated to make, and a touch too lah-di-dah for a simple baker such as moi? Shouldn't I be more comfortable with a bog standard Coconut Macaroon (double 'o')? Well, oui, c'est vrai - Coconut Macaroons are delicious too. But sometimes you want a touch of Parisian chic, n'est pas?


So don't fret. Macaron-making didn't live up to the hardcore hype for me (although perhaps that was beginner's luck!) If you're a bit apprehensive about giving them a go, then this is the recipe for you. To make life simple, I used Belgian chocolate spread for the filling, so that I could concentrate on the shells. The shells froze really well, so that I could make them in advance, then defrost on the day I wanted to serve them, just sandwiched together with the chocolate spread.

They also make rather excellent and delicate gifts...

Super simple Chocolate Macarons
Parisian-style Chocolate Macarons
Makes about 50 shells (25 Macarons)

Ingredients:
3 large egg whites (at room temperature - this is important)
125g ground almonds
125g icing sugar
25g cocoa powder
125g caster sugar

Belgian chocolate spread to sandwich
Alternatives: Nutella, raspberry jam, vanilla buttercream, peanut buttercream... go wild!


Method:
1. Pulse together the almond, icing sugar and cocoa powder until it is very fine, then sift into a super-clean bowl (any touch of greasiness will sabotage your macarons).

2. Put the egg whites in a bowl with half of the sugar. Beat on a low-medium speet with and electric whisk. When you reach the soft peaks stage, increase the speed of the whisk, and continue until you have stiff peaks. Add the rest of the caster sugar and whisk until all of the sugar is disolved.

3. Add the eggs to the almond/chocolate powder, and fold gently, being careful not to lose any of the air. Don't overmix it. The mixture should be smooth and glossy and should form a ribbon when dripped from the spoon.

4. Put the mixture into a piping bag (never more than half-fill it at a time) and pipe walnut-sized blobs onto baking paper on a couple of baking trays. These will flatten out over time. Smack the trays down on your work surface a couple of times to remove and bubbles and let them site for 20-30mins, until a skin starts to form on the top of the shells, and they are no longer wet to the touch.

5. Bake at 160 degrees celcius at 12-14 minutes. By this time, you should be able to see the traditional 'foot' (ridge) at the bottom of the shells. To test if they are done, gently tap the side of a shell,and  it should remain firmly on its foot.

6. Allow to cool thoroughly on a wire rack before attempting to remove from the baking paper. Then, sandwich together with the filling of your choice.


7. If giving as gifts, wrap them in cellophane and tie with a nice ribbon - but they're best eaten within 24 hours or so. (If they even last that long!)


Who wouldn't want a gift of Chocolate Macarons?

Sunday, 15 April 2012

Through the looking glass...

This week saw the 'final project' of my cake decorating class. Having been ridiculously excited about this for weeks and weeks, I may have come up with a slightly over-ambitious project. In the end, it took longer than the two-and-a-half hour session to decorate this cake (quite a lot longer, actually!) but I got the chance to create the semi-gothic wonderland I've been dreaming about since the project was announced, and which has resulted in 'research' in the form of Tim Burton's Alice in Wonderland, and much time spent on google images.


Mel hosted a 'cake unveiling' yesterday, with the hope that, with help, we could limit the calorific damage of two gargantuan sugarpaste creations. However, even with the best efforts of friends and colleagues, we barely made a dent in the mountains of cake required to support the sugarpaste creations.

Ah, well. It'll be cake all round in the office next week...


Alice in wonderland cake/
White chocolate and raspberry rainbow cake with white chocolate buttercream

10" cake - provides about 30-40 servings.

Ingredients:
500g margarine (I used Stork)
500g caster sugar
500g self raising flour, sifted
250g plain flour, sifted
9 large eggs, beaten
1 tsp vanilla extract
1 orange - zest only
multicoloured sugar sprinkles
100g white chocolate, roughly chopped into chunks

For the filling:
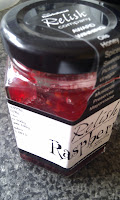
4 tblsp raspberry jam.  I used raspberry and vanilla jam by Relish. Pricy but scrumptious!

175g unsalted butter, softened
500g icing sugar
90ml milk/soya milk
1tsp vanilla extract
200g white chocolate

To decorate (optional):
1kg sugarpaste icing, to cover (optional)
Plus extra for decorations of your choice

Method:
1. Grease and line your cake tin, and wrap four of five layers of newspaper around the outside of your cake tin. This will help it to bake evenly, without the outside edge burning.

2. For the cake, cream together the margarine and sugar until the mixture becomes creamy and white.

3. Gradually stir in the egg a little at a time. If the mixture begins to curdle, add in a little of the flour (a tablespoon at a time) to stop this happening. Keep adding the egg, little by little.

4. Coat the white chocolate chunks in some of the flour, and gradually mix in the remaining flour, white chocolate and orange zest. At the last minute, stir in the coloured sugar strands. These will give the inside of your sponge a rainbow effect. Spoon the mixture into the prepared tin, leaving a big hole in the centre. This will fill itself in as the cake rises.
5. Bake the cake at 160 degrees celcius (145 degrees celcius if it's a fan oven) for about 2-2.5 hours (checking after an hour and three quarters). Pop a bowl of water on the bottom of the oven as you bake, as this will help the cake to retain moisture. Also, put a baking sheet on the shelf on top of the cake, to protect it from the heat a little. If you feel the cake is browning too much on top, you can cover it with tin foil. The cake is done when a skewer inserted into the middle comes out clean.

6. When the cake is completely cool, you can trim it to ensure it is completely flat (the trimmed top will be made into the bottom of the cake), slice it in half and prepare the filling. Gently heat the white chocolate in a bain marie until it is completely melted. Set it aside to cool slightly as you prepare the rest of the buttercream.

7. Whisk together the butter, icing sugar and vanilla extract wth a hand whisk. Gradually pour in the milk as you are whisking, but take care not to overwhisk the mixture. Pour in the cooled, melted white chocolate, and stir with a spatula until mixed together. Then whisk until the buttercream has a light, fluffy consistency, adding a tablespoon or so or extra milk if necessary.

8. Spread the raspberry jam on one half of the cake, and spreadthree quarters of the buttercream on the other half. The place the two halves together, buttercream and jam facing inwards.

9. Use a palette knife to spread the rest of the buttercream around the top and sides of the cake. If you are not using sugarpaste, then sprinkle with some multicoloured sugar strands and serve. Otherwise, the buttercream gives a smooth surface for your sugarpaste icing to stick to.

10. If using sugarpaste, roll out to the desired thickness and cover the cake, smoothing carefully. This cake will keep in an airtight container in a cool room for a good week. Do not keep it in the fridge, or the chocolate in the buttercream will set like concrete!

The hot day was making Alice feel sleepy...


 "Oh dear, I shall be too late!" exclaimed the white rabbit.
"Why is a raven like a writing desk?", asked the hatter.
"Off with their heads!"


"You're nothing but a pack of cards!", cried Alice...


... and she found herself lying back on the bank...


... so she closed her eyes, and half believed in wonderland.

Friday, 6 April 2012

Aubergine Caviar and Courgette Caviar

Traditionally, Good Friday is a meat-free day, aka 'Fish Friday'. And what better way to bring this to life here than with a bit of fish free 'caviar'?

For those who don't know, I'm particularly interested in all things Russian, though I'm not sure that my interest extends to the food. Whilst the countries of the Caucasus and Central Asia have yielded some pretty delicious dishes, I'm afraid that traditional Russian cuisine dosn't speak to me quite so much. Perhaps this is because (aside from soups and pickles, which are in a league of their own) traditional Russian cooking only has a limited lot to offer to vegetarians, let alone vegans.

However, there are the odd couple of things that are worth mentioning, and they come into their own when the weather turns warmer, and we start craving simpler, lighter food. These two 'caviar' recipes are inspired by Sofka Skipwith's 'Eat Russian', a charming little food and cookbook from the Soviet era. They are partcularly good served with a nice wholesome bread (here served with Marathon Bread from Barbakan), and a simple salad of tomato and cucumber or gherkin.


Aubergine Caviar and Courgette Caviar
Serves 6-8


Ingredients:
2 aubergines
3 courgettes
2 onions
2 tomatoes
3 tblsp sunflower oil
3 tblsp cider vinegar
salt and pepper to taste.


Method:
1. Cut the courgettes and aubergines in half lenthways and arrange, cut-side down, on baking trays with about a centimetre of hot water on the tray. Pop in the oven for about 15-20 mins at 180 degrees celcius to steam gently.


2. Meanwhile, prepare the rest of the vegetables. Firstly, you will need to skin the tomatoes. To do so, score a small cross in the top of each tomato, then submerge completely in boiled water. Leave for about 10 minutes, after which time, you can remove the tomatoes and the skin should peel off easily.Then finely chop the skinned tomatoes.


3. Whilst the tomatoes are sitting in the boiling water, very finely chop the onion.

4. When the aubergines and courgettes are steamed, remove them from the oven and allow to sit until cool enough to handle. Finely chop the flesh (keeping the courgette and the aubergine separate).

5. Set up two frying pans, and divide the oil, vinegar, onion and tomato equally between them. Add the aubergine to one pan and the courgette to the other. Gently simmeron a low heat to evaporate off any exess liquid. Allow to cool and refrigerate - serve very cold as part of a buffet dinner with bread and salad.